Showing posts with label Wild at Heart collection. Show all posts

Wednesday, 25 August 2021

Life is a Blank Canvas | Cocoa Vanilla Studio


Hi everyone, today I am sharing another layout created for Cocoa Vanilla Studio, this time for the August monthly challenge. This challenge was actually designed by me, and I think almost everyone will be able to find an element to inspire them from the board, whatever your style.

Here's a look at the board, entitled "Life is a Canvas"...


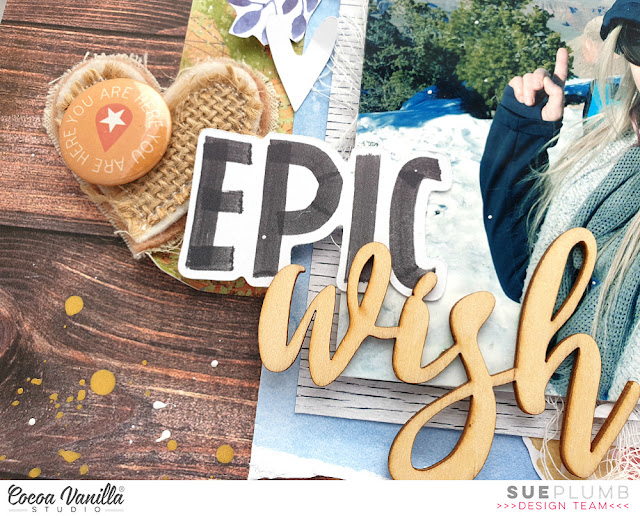
And here is my sample layout...


I really love the mix of eclectic images that I put together for this arty board. There are lots of rich, vibrant jewel tones; textures like brick and wood; and (of course) a butterfly. I did a bit of stash-busting for this page, and used the Wild at Heart collection from a few years ago, as I thought the colours and theme of this collection worked well with the board. The photo I was working with was one of my daughter with paint smeared on her face. 


I started my page by creating a mixed media background using Distress Oxides. I used Faded Jeans first (one of my very favourite oxide colours), by swiping the ink pad on my messy mat, mixing it with a little water, and then laying my cardstock over the top to soak up the colour. I then layered some Worn Lipstick over the top, which I applied using the packaging technique to give me a little more control over the placement of the colour. I then added some splatters using Mustard Seed and a fine paint brush.


Next, I added some stencilled detail using an arty themed stencil from Dusty Attic. Again, I used the Faded Jeans Distress Oxide, only this time I used a sponge to apply it through the stencil. For my next layer, I added some stamped detail over the top using a brick pattern stencil from Viva Las VegaStamps and black ink.


The next element I introduced to my page was a cut file from Cut to You. The cut file I used was the Craft a Happy Life page builder file, and I altered it by enlarging it and only using part of the design (the paint brushes) for my layout. I left the cut file white, and layered it over my mixed media background, which allowed the layers to show through the gaps. 


Then came the easiest part, which was adding some layers of patterned papers to mat my photo, some frayed gauze, a paper doily, and then the photo itself. I also fussy cut some floral pieces from another patterned paper that I used to tuck into my layers above and below my photo. I also added three fussy cut butterflies.

For my title, I used the new 'These Days' foam title stickers for the word life and some other small alphas from my stash for the remainder, then finished off the quote with typed strip journaling. 


I finished off my layout by using the same Distress Oxides and a water brush to add some colour to the tips of the cut file paint brushes; and by adding a few sparkly enamel dots. 

I would love to see your take on my mood board! Entries close 31st August and you can enter via the Cocoa Vanilla Studio Community group. A random entry will win a $25 voucher to spend in the Cocoa Vanilla store on some scrappy goodness, so get busy!
Until next time, happy scrapping! X 


Saturday, 11 July 2020

Best Ever! | StencilGirl


Hi friends!

I am popping in today to share my most recent project created for the StencilGirl® Creative Team. During May and June the Creative Team members worked with the theme of "Typography". Typography in artistic terms means using type as an intrinsic part of the artwork, or in some cases (particularly modern art), it may even be the artwork itself. For my piece, I decided to demonstrate how I often like to incorporate type on a scrapbook layout - as the basis of my background.

For my page, I chose to document a special photo of my daughter that was taken at her primary school graduation last year when she was awarded Dux (or Valedictorian for my American friends) of her school. This was the perfect subject to pair with a background featuring type. 


I began my project by adding some color diagonally across my cardstock. I used Mermaid Lagoon Distress Oxide with what I call the "smooshing" technique. (This is where the ink is mixed with water on a piece of plastic and then applied by smooshing it down onto the page to give a watercolor style effect - you can see it in action in my process video below.)

Next, I selected my stencils. I wanted to use two different types of fonts that I could layer on the page as part of my background. The first one I chose was the Wall of Words 9x12" stencil designed by Carolyn Dube. This stencil is full of words of wisdom, motivation, and laughter; and due to the uniformity of the text style, I thought it would be ideal as part of my background. The second stencil I chose was one of my favorites - Rembrandt's Words Small stencil. This stencil was also designed by Carolyn Dube and I thought the flowing script would provide a good contrast against the structured text of the Wall of Words stencil.


I used a small sponge to dab ink randomly through the Wall of Words stencil along the diagonal line of color I had created on the page. In some places, I overlapped lines of text to give a random, jumbled appearance. I then used Colour Blast by Bee Arty 'Deep Water' Colour Paste with the Rembrandt's Words stencil to add contrast and subtle dimension before leaving it to dry naturally for a short while.


I then returned to work on the textural layers that were going to go behind my photo in the focal area of my page. I used crumpled tissue paper, a paper doily, patterned paper, cotton thread, and frayed gauze to create a stack, then placed my photo on top. I then fussy cut some pieces from a Cocoa Vanilla Studio floral patterned paper which I tucked in under the diagonally opposing corners of the photo, further enhancing the flow of the page.


To give the diagonal design both a start and endpoint, I created two small clusters along the top and bottom edges of the page (which also helped to balance out the heavy focal area in the middle). I used a mix of patterned papers and embellishments from the same Cocoa Vanilla Studio 'Wild at Heart' collection that the floral pieces had come from. I also added some extra embellishments around my photo.


At this point, I decided my layout needed a little bit of something extra and I really wanted to tie in the gold color from the photo as well. I reached for my Military Style Stars stencil by June Pfaff Daley and some gold texture paste and stenciled some little gold stars across the page. I also added some splatters of gold mist and pink ink; and three fussy cut butterflies. 

And then I did something I don't usually do. I decided the background text on my page wasn't defined quite enough, so I went back in with the Wall of Words stencil and added some extra stenciled type. As soon as I had done it, I then felt it looked much better and my page was complete.

If you would like to watch exactly how it all came together, you can watch my process video here:


Thanks for stopping by so I could share this with you. Until next time, happy creating! X

Monday, 1 June 2020

Epic Wish | Cocoa Vanilla Studio June Challenge


Hi friends!
I am super excited to be sharing this with you today - Cocoa Vanilla Studio now has a new monthly challenge that will be held in our Cocoa Vanilla Studio Community group on Facebook. (Yay!) Each month the design team will take turns to collate a mood board to be used as inspiration and I am so happy to say the June mood board was put together by me!

Here's a look at my "Rustic Trails" board...


And here is the layout I created that was inspired by the board...


I decided to draw on the travel theme that was represented in the board by documenting a selfie I took at the Grand Canyon. This was taken at the moment I first walked up to the edge, and was a moment I had dreamt of for most of my life. The Grand Canyon had long been #1 on my travel wish list, so to finally be standing there was almost beyond belief (and may have even caused me to shed a few tears). 


I began my layout with the wood grain paper from the 'Legendary' collection, which was inspired by the image of the gorgeous timber table on the board. (I love this paper so much!) I then set about adding some paper layers. First, a piece of the map print, which is the reverse side of the wood grain on the Outdoors Type paper. I trimmed down a rectangle shape so that there was only a little green showing and it was largely the warm, earthy orange tone I was looking for.


Continuing on with the wood theme, I used the white wood grain paper from the 'Wild at Heart' collection to mat my photo. I added a second layer, again using a paper from 'Wild at Heart', that featured a pretty blue watercolour to tie in with the blue sky in my photo. I also tucked a grey doily into my layers before stapling the stack together and sticking it onto the page. To add some texture, I added frayed gauze, then stuck my photo down on top. 


Now it was time to draw in those beautiful rustic flowers from the board by adding some fussy cut floral pieces. I used a floral paper (again from 'Wild at Heart'), and tucked them in under the edges of my photo to frame it. 

At this point, I really wanted to add an extra floral element, and I also wanted to draw in the white from the board, so I used the beautiful 'Bouquet' cut file from Cut to You. This is a fairly large piece, so I actually cut it into sections so I could tuck it into my layers and add to the diagonal flow of the page. I topped the cut file with a couple of vellum flowers from the 'Love Always' collection.


Now it was time for some smaller embellishments. First my page needed a title, so I used the word EPIC from the 'Legendary' die cut tile words combined with the wood veneer word wish from the 'Make a Wish' collection. I really wanted to draw in the hearts from the board, so I also added a few wood veneer hearts from the same pack, a Charms Creations handmade heart and a few white cardstock hearts I had left over from previous cut files. 


I found the perfect flair button in my stash to pop on top of the Charms heart, which came from the 'Made of Awesome' collection. (This boy collection is no longer available in physical form, but you can purchase it as a digital bundle to print and cut yourself at home HERE)

I finished off with some splatters of gold Heidi Swapp Color Shine and some splatters of 13Arts white acrylic ink. (And yes, some of them got on the photo but I don't care - I was standing in the snow anyway!)

If you would like to watch this page come together you can check out my process video on my YouTube channel here:


That's all from me today. If you love the look of my "Rustic Trails" mood board and would like to join our challenge, make sure you are a member of the Cocoa Vanilla Studio Community group. Simply upload your entry into the challenge album there to go in the running for a $25 store voucher.
Happy scrapping! X

Thursday, 10 October 2019

Oh Hello You | Scrap the Girls October Challenge


Hi everyone!
Popping in today to share my take on the October challenge for Scrap the Girls. As this month is breast cancer awareness month, we have an awesome challenge called "It's All in the Bra". Find your bra according to your star sign and use it to inspire your page - fun, right?!


I am a Virgo, and I was SO happy to get the denim bra! (I am a massive denim fan and would live in jeans all year round if I could.) I even decided to document a photo of me in my favourite denim jacket (enjoying a sneaky lunchtime wine).

Here is what I created...


I began my page by creating a watercolour background on white cardstock using 'Faded Jeans' Distress Oxide. To do this I simply swipe my ink pad onto my non-stick craft mat, spray with a little water, and then lay my cardstock over the top and smooth it down with my hand before drying it off with a heat tool.


Next, I set about creating a distressed strip design that was inspired by a layout created by Anna Komenda for Cocoa Vanilla Studio whilst we were on retreat back in May. (You can see Anna's page HERE). 

I used patterned papers from the Cocoa Vanilla Studio 'Hello Sunshine' collection (including a denim fabric print); mixed with the specialty vellum sheet from the 'Wild at Heart' collection. I distressed the edges of each paper strip using a pair of scissors and layered them vertically down the page. I also interspersed the papers with a few pieces of denim fabric cut from an old pair of jeans.


Once the background paper and fabric strips were in place, I added some thick cardboard to the back of my photo and stuck it down on top. I then added a chipboard frame (also from the 'Wild at Heart' collection) on an angle over the top of my photo.

  
To embellish my page I chose a couple of floral pieces from the 'Wild at Heart' die cut ephemera pack, which I tucked in under the edges of my photo; and a butterfly from the chipboard accent stickers which I tucked in under the edge of the uppermost strip.


Alongside my photo I added a handmade denim star from Charms Creations, which I topped with a Cocoa Vanilla Studio limited edition flair button. 

My title was a mix of 'Hello Sunshine' denim print alphabet stickers and the word hello from the 'Wild at Heart' chipboard stickers. 


To finish off my page I added a couple of stickers from the 'Wild at Heart' Accessory Sticker sheet; a chipboard arrow label; and stamped the date. (If you love this range as much as I do, check it out in the Cocoa Vanilla Studio store HERE and grab a bargain!) 
I was really happy with how this page turned out, and was surprised how quickly it came together (all done under an hour).

I would love to see you play along with this month's challenge. We have a prize pack from Helmar up for grabs for our Aussie winner and as always, Scrap Accent are generously sponsoring our international winner. You can head over to the Scrap the Girls blog HERE to see what the rest of the team created for this challenge.

That's all from me today. Until next time, happy scrapping! X

Friday, 18 May 2018

You Make My Heart Sing | Cocoa Vanilla Studio


Hi everyone!
Following on from my previous post about my upcoming classes at the Brisbane Scrapbook Expo using the 'Wild at Heart' collection from Cocoa Vanilla Studio; comes this sweet little off the page project I created using the very same collection.


Having created one of these frames before, I knew I already had a spare one in my stash cupboard that I had also conveniently pre-primed with some Colour Blast white heavy gesso. So when mojo hit me to create something different to a layout, it was simply a matter of pulling out the embroidery hoop, finding a photo and reaching for my Cocoa Vanilla Studio supplies.


I used a pic of my sister and I together and drew on the blue tones from the photo to inspire my colour scheme. I used a variety of die cut ephemera pieces including a printed doily, bow, flowers, leaves and butterflies. 


I framed the photo using one of the chipboard frames, (which I trimmed down slightly on the left corner to fit). I added the together sticker from the accessory sticker sheet onto my frame.


To tie in the timber theme more, I also added some hearts from the wood veneer words pack and then a few scattered enamel dots (sparkles). The final embellishment I added was the you make my heart sing chipboard accent sticker.
I then took a tiny bit of Colour Blast 'Just Blue' Colour Paste on my finger tip and rubbed it into the frame to give it a blue tint. 

Thanks for stopping by so I could share this with you today.
Don't forget to check my previous posts with all the details of the three classes I have coming up at the Brisbane Scrapbook Expo for Cocoa Vanilla Studio next month. If you have any questions about any of my classes, don't hesitate to ask!
Until next time, happy scrapping! X

Thursday, 17 May 2018

"Wild Side" Class | Brisbane Scrapbook & Papercraft Expo


Hi everyone! 
Here's the details of the final class I will be teaching at this year's Brisbane Scrapbook & Papercraft Expo! (If you missed the details of the other two, make sure you check out the details of my 'Boys Rule' class and 'Bohemian Rhapsody' class)
Today I I am sharing some sneak peeks and information about my "Wild Side" class with you.

Date: Thursday 7th June (one session only!)
Time: 2.30pm - 4.30pm


Participants in this class will be working with the beautiful 'Wild at Heart' collection from Cocoa Vanilla Studio to create two layouts. Kits include assorted papers; die cut ephemera; stickers; chipboard stickers; flair buttons and enamel dots.


The class will also incorporate some simple but effective mixed media techniques to add that extra little "something" to each of the layouts. (Don't be afraid, you won't get messy!) 
Participants will need to bring their basic tool kit including paper trimmer and craft mat; double sided tape; 3D foam adhesive; and photos.

Photos required:
- 3 x 3x4" (portrait) - B&W or colour (note colours used if using colour)
- 1 x 4x6" (landscape) - B&W or colour (B&W preferred)
*Tip* print photos with borders or mat with white cardstock to really help them pop


This is the only session that this class will be held and places are strictly limited, so ensure you book early to avoid disappointment.

To book a place, head directly to the booking page here:  https://expertiseevents.eventsair.com/scrapbook-papercraft-expo-2018/classes/Site/Register

If you have any questions about the class or requirements, please don't hesitate to contact me. Click HERE to email me or you can message me via my Sue Plumb Designs Facebook page
(I will be sharing sneaks from the two other classes I will be teaching soon.)
Hope to see you there! X

Tuesday, 30 January 2018

Creating Paper-Based Layouts | Scrapbooking Memories magazine


Hi everyone!
Popping in today to share a couple of older layouts that were included in my Creative Team 'Paper Play' article that was published in Scrapbooking Memories magazine (Vol 20 No 5). This article was about creating more "traditional" paper-based layouts, and techniques and ideas to include.
Sadly, as it turns out, this was the final issue of the magazine that went to print and it has since ceased publication.

This first page was created using the beautiful Cocoa Vanilla Studio 'Wild at Heart' collection and featured a photo of myself, my hubby and our best friends during a climb up Mount Beerwah.


I used lots of layering, and fussy cut some of the floral elements from the 'Memento' patterned paper to use as embellishments for this page.


I also used the coordinating chipboard accent stickers and Sparkles enamel dots from the collection to embellish my page.


I used paper tearing and the addition of some messy cotton thread to add texture to my page.


The second layout included in my article, was a 'stash-buster' that I created from one of my favourite older ranges - 'September Skies' by Heidi Swapp. I used up a variety of paper scraps I had left on this page, along with some coordinating ephemera pieces. (I may still be hoarding a few final scraps! LOL)


I even managed to use a photo of the kids that I had printed out long ago as well! #winning


 Extra embellishments included a limited edition flair button from Cocoa Vanilla Studio; dip dye tag and twine from D-lish Scraps; and some foam stickers from Pink Paislee.


Again, I used paper tearing and cotton thread to add texture to my page.


Don't be afraid to use lots of overlapping bold patterns and colours if it fits in with the theme of your photo. I love seeing these papers all layered over one another.


Thanks for stopping by today so I could share these with you. I will be back very soon with a new project to share with you. Until then, happy scrapping! X

Thursday, 21 September 2017

Love You | Cocoa Vanilla Studio

Hi everyone! Today I have my latest Cocoa Vanilla Studio design team project to share with you featuring the beautiful 'Wild at Heart' collection, and a photo of me with my three children. (All looking in the same direction AND smiling - it's a photographic miracle! haha)


Knowing in my head I wanted to add some mixed media to my creation, I started my layout with a sheet of white cardstock, then added vertical strips of both the 'Bohemian' and 'Patchwork' papers to define the focal area of my page.


I then added a mat for my photo cut from the beautiful marbled print side of the 'Grow Wild' paper and some frayed gauze for subtle texture.


Next, I took a sheet of the gorgeous floral 'Memento' paper and fussy cut several large floral pieces from it. I used these to tuck around my photo, and also to create to focal anchor point in two of the diagonally opposing corners. This helped bring balance and flow to my design. I then used Colour Blast 'Blush' Colour Shimmer Cube to highlight and extend on each of the floral pieces. I also added add some soft splatters around my page using the coordinating 'Blush' Colour Shimmer Spray.


For the cluster in the bottom right corner, I topped the floral piece with one of the rubber charms and a small heart from the chipboard accent stickers sheet. For the top left cluster, I added a small heart from the die cut ephemera pack. I also added a sentiment from the ephemera pack directly onto my photo.


I used the large love you from the chipboard accent stickers as my layout title, adhering it directly below my photo and emphasising it with a die cut ephemera frame that I cut into pieces.


To finish off, I added a beautiful butterfly from the ephemera pack and then I left it at that. I was really happy with the soft, understated result of this page.

Thanks so much for stopping by the blog today so I could share this with you. I will be back in a couple of weeks with another project to share. Until then, happy scrapping! X