Showing posts with label Guest Designer. Show all posts

Saturday, 28 November 2020

Yum | Kitaholic Kits November 2020


Hi friends! Sadly, this is the last of my Kitaholic Kits guest designer layouts for the month using the November kit and mixed media add-on. This is the fourth layout I have created from this kit, along with some extra pocket pages, and I still have some left to create with!  

For this layout, I decided to document some photos of my daughter that were taken almost 10 years apart - to the day! The focus of my page was the remaining pieces I had of the cut apart sheet from the Crate Paper 'Marigold' collection and one of the subscriber exclusive cut files designed by Anita Bownds.


I used white cardstock as the base for my page, and added the Pebbles Jen Hadfield black and white checkered paper from 'The Avenue' collection over the top.


For my embellishments I used a mix of the Pinkfresh Studio floral ephemera, puffy alpha stickers and one of the subscriber exclusive cut files,which I coloured using watercolour paint.


I also used some stickers from the Heidi Swapp 'Old School' collection and added some sparkle with Ranger Stickles Glitter Gel.

I have a process video available for this layout on my YouTube channel if you would like to see how I put this one together. And if you haven't already, I would love it if you subscribed to my channel while you are there. 


Until next time, happy scrapping! X

Sunday, 22 November 2020

Good Vibes | Kitaholic Kits November 2020


Hi everyone! I am super excited to share the third of my Kitaholic Kits guest designer projects with you today. For this one, I decided to create another masculine layout, but use a bit more mixed media than my previous two projects.  


As I was documenting a photo of my boys at the beach that was taken on their birthday, I wanted to give my page a "watery" vibe, so I used Distress Oxides to create a watercolour style background on my cardstock using my messy mat.


Over the top of the ink I added some stencilling using one of the Vicki Boutin stencils and the Ranger Stickles Glitter Gel - both from the mixed media add-on kit, and (of course) there was some ink splatters too. 

The papers I used were a mix of Crate Paper and Heidi Swapp from the kit, along with some of this month's subscriber only exclusive printables thrown in. 


For my embellishments I used a mix of Heidi Swapp stickers; Pinkfresh Studio floral ephemera; and a Charms Creations handmade heart from my stash.


I have a process video available for this layout on my YouTube channel if you would like to see how it came together:


For current Kitaholic Kits subscribers I also have some companion pocket pages that I created to match this layout, which are available exclusively in the Subscribers Facebook group. (Additional content is only one of the benefits of becoming a kit subscriber. You can check out all the other benefits HERE)
I've got one more guest designer project to share using this kit, so make sure you keep an eye out for it.

Until next time, happy scrapping! X 

Sunday, 15 November 2020

Frank | Kitaholic Kits November 2020


 Hi everyone! I am here today to share the second of my guest designer projects for Kitaholic Kits using the November scrapbook kit and mixed media add-on kit. If you recall my first project, I documented some photos of my son dressed up as a character from a story he wrote, so for this page I decided I had better create a layout of his twin dressed as his story character too.


I used white cardstock for my page base, then layered it with the Crate Paper wood grain paper and the Jen Hadfield (for Pebbles) text print paper, which I punched with a notebook style punch. (I thought this would work well with the "story" theme.)

I also added a row of stencilled lines across the top and bottom of the page using one of the new Vicki Boutin 'Storyteller' stencils from the mixed media add-on kit. 


As with my previous project, the story was an important part of the page, so I used another of the Pinkfresh Studio pockets and a journal tag to be a prominent feature of my design. I also added almost identical journalling, just changing the relevant details to personalise it for him. I also added a QR code to the back of my tag that linked to a video of him reading his "Frank the Zombie" story. 


For the embellishments, I used a mix of the Heidi Swapp cardstock and phrase stickers; a few of the subscriber exclusive printables; and some of the Pinkfresh Studio floral ephemera pieces. I also used the Pinkfresh puffy alphas for my title. 


I have a process video available  if you would like to watch how this layout came together. (If you like what you see, I would love it if you would become a subscriber of my YouTube channel too.) 


That's all from me today. If you would like to check out the Kitaholic Kits shop, or investigate about becoming a kit subscriber so you can receive your own box of happiness each month, visit the Kitaholic Kits website HERE
Until next time, happy scrapping! X

Saturday, 7 November 2020

Baking Memories | Kitaholic Kits November 2020


Hi everyone!
Today I am happy to be sharing the first of my guest designer projects for Kitaholic Kits using the November kit and mixed media add on kit. This month's kit is filled with products from Heidi Swapp, Pinkfresh Studio, Crate Paper and Pebbles; and the mixed media kit with products from Vicki Boutin and Ranger. (If you would like to see exactly what is in the kit, I have an unboxing video on my YouTube channel HERE)


For my first project, I found myself drawn to the Jen Hadfield leaf print paper, which I thought would work well with some outdoor photos. I was also drawn to the Pinkfresh Studio journalling bits, so I knew I wanted to create a page that had a good story behind it. I came up with the idea of documenting a series of photos of one of my boys that were taken during our remote learning period. On this day, my boys had both written Dr Suess style stories, and then we did a dress up photo shoot of the main character from each of their stories. This is Hunter dressed as "Fred the Dragon".


I chose to keep the leaf print paper to use as a border for my page (because I thought it gave it that "story book" vibe), and used a sheet of white cardstock with brushed acrylic paint for my background.


Layers of torn and distressed patterned papers mixed with a paper doily, frayed gauze and Heidi Swapp stickers formed the basis of the focal point of my design. 


I used the Pinkfresh 'Days of Splendour' floral ephemera to create clusters for my page, which I brushed with the Ranger Stickles 'Moon Dust' Glitter Gel for a touch of sparkle.


I then added more stickers, a few rhinestones, and a punny title by altering the title printed on the Pinkfresh envelope with puffy alpha stickers. 


To finish off, I printed my journalling and stuck it onto the tag.


Below you can see where I have added a QR code on the back of the journal tag that links to the private video on my YouTube channel of Hunter reading his story. This is a great interactive element to add to layouts and helps share more of the story than you can fit on the page.


So there you have it! If you would like to watch me put this page together, I've got a process video on my YouTube channel: 


Thanks so much for stopping by today so I could share this with you. I have plenty more to come from this kit, so stay tuned!
Until next time, happy scrapping! X

Wednesday, 27 November 2019

"Epic Adventure" Mini Album | Scrapping Clearly


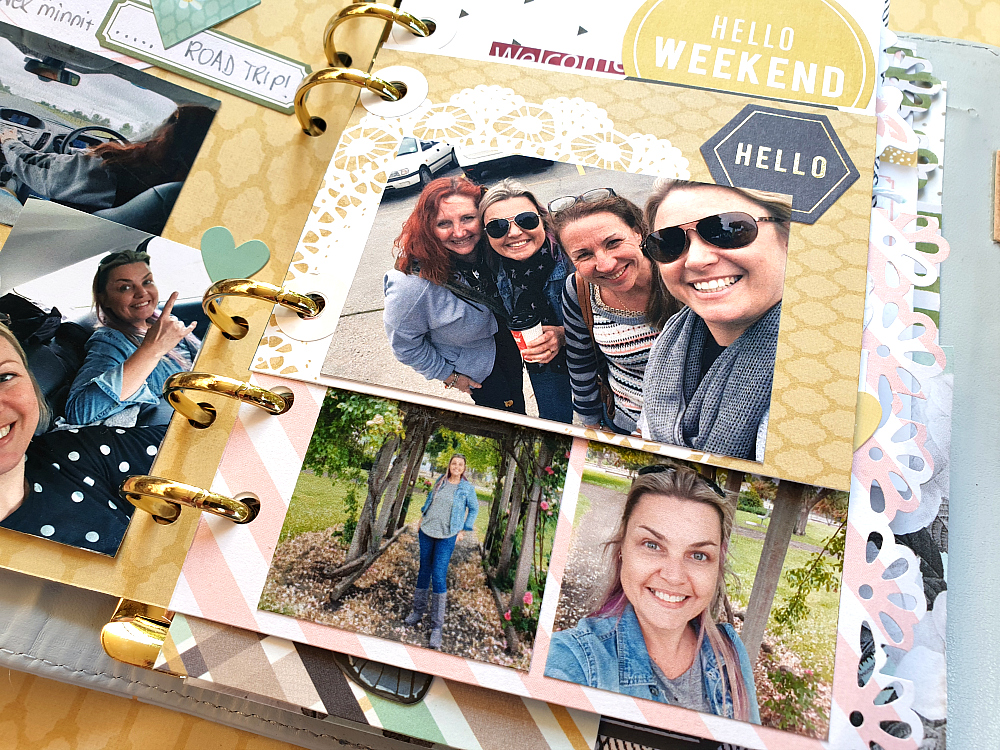
Hi everyone! Back again to share my final project that I created as a guest designer for Scrapping Clearly last month. Today I am sharing a special mini album I created to document an epic adventure I had with my sister - a surprise weekend away to celebrate her birthday that was organised by her partner (and a few sneaky scrappy gals!)


There is so much to love packed into this album - not just the memories, but some beautiful products too. I have found myself using a lot more patterned papers lately, and falling in love with paper all over again.

So, let's get started on this album. I began with a pile of photos and a small 6 ring binder-style planner I purchased at Kmart. I opened it up and removed everything from the inside, leaving me with the cover only. 


I started by making myself a "kit" of coordinating items to work from that included a variety of patterned papers; stickers; and die cut ephemera.


I chose a number of patterned papers from the Simple Stories 'Heart' and Heidi Swapp 'Emerson Lane' collections; with some odd sheets from Pink Paislee and Websters Pages added in. My main criteria when choosing the papers for my kit was colour choice - with both the A and B sides of each one needing to fit my chosen palette. 


I started by cutting the sheets of paper into smaller "pages" - trimming each one into a variety of different sizes and shapes. I then used a few different decorative border punches to punch along some of the edges. 


Now it was time to sort the pages into some sort of order. I shuffled and stacked them, making sure that the sizes were mixed up and that colours and patterns on facing pages were complimentary to one another. I then punched each page using an adjustable 6-hole punch; adding some hole reinforcer stickers as I placed them into the binder.


With all of my pages in place, it was time to start adding my photos. (I do admit that the order of the pages did get shuffled a little as I began to work my way through the book.)


I treated each page just like a tiny scrapbook layout - I had a background, photo/s and now they just needed embellishments. I didn't want to use anything bulky because I wanted to make sure the pages would lay flat, so I chose a mix of stickers and die cuts to use.


To coordinate with the papers I had chosen, I used the Simple Stories 'Heart' Cardstock Stickers; and the Heidi Swapp 'Emerson Lane' Stickers and matching Ephemera


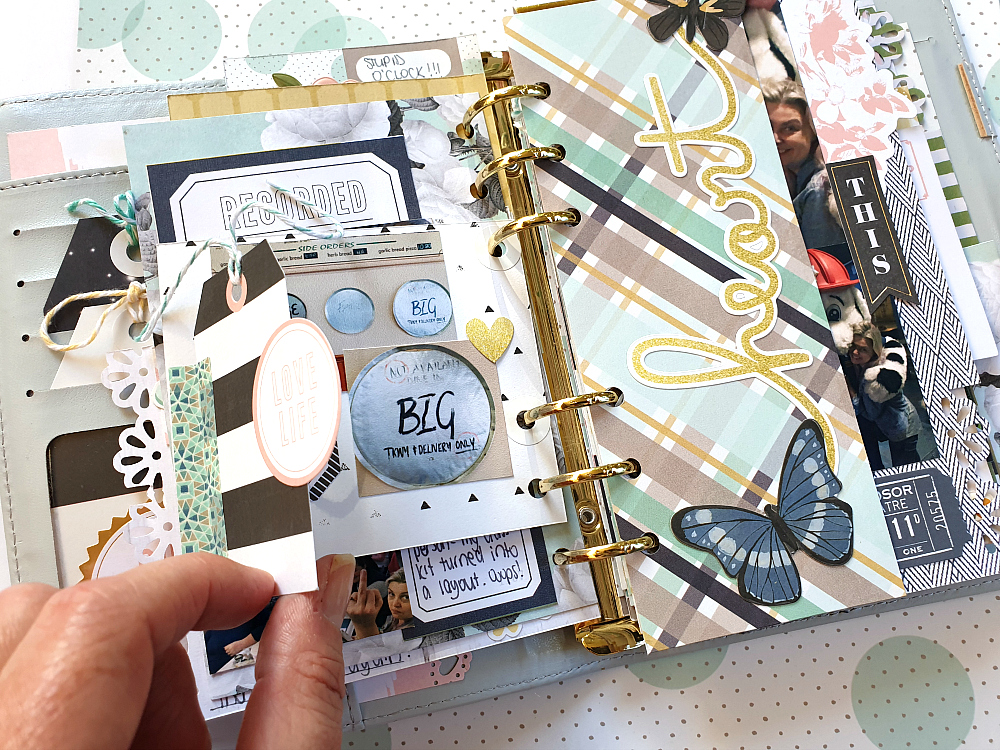
Throughout the album I added extra interest to some of the pages by adding "tip-ins" (extra interactive flaps) using tags / ephemera / pieces of paper, which I fastened with washi tape. (There is even a set of coordinating 'Emerson Lane' Washi Tapes!)


I left some of the pages in the album photo-free and kept them simply decorative. You can see how having a good variety of different page sizes, colours and patterns adds plenty of visual interest.


I did choose a couple of embellishments that were slightly dimensional to use in my album - the super cute Pebbles 'Spring Fling' Puffy Stickers - Flowers; and the 1 Canoe 2 'Globe Gallery' 3D Butterflies.


I made an effort to include handwritten journalling on as many of the pages as I could - using a variety of labels, journal tags and even paper offcuts to write on.


Another way to switch things up in the album is to add the photos sidewards - just as I did with the landscape shot, which allowed it to be printed larger.


Never be afraid to punch directly through a photo to turn it into a page itself; and when dealing with small pages, sometimes it is better to embellish over part of the photo.


When working on a small scale like this, especially with papers featuring bold patterns, it is better to keep to the "less is more" rule with embellishments.


Look at the papers you have and see what can be fussy cut from them to use as embellishments, such as flowers, labels, shapes and quotes.


Design tip: to help your embellishments stretch further, cut things such as label stickers in half. The irregular shape also makes it more interesting to look at.


Another way to add extra interactive elements to your album is to include small envelopes, which can be used to hold memorabilia, journalling or even extra photos (just like I did in my special "sealed section").


This is by no means all the pages from my album - there are just too many pages to share here (and some still to be completed). Once I have them all finished I will try and film an album flip through to share with you on my YouTube channel and in the Scrapping Clearly Facebook group

A big thanks to the gorgeous Kylie and the team for having me as a guest - I so enjoyed creating and  sharing my projects with you.
If you would like to shop up a storm in Kylie's store, you can find it HERE
Until next time, happy scrapping! X

Thursday, 14 November 2019

Happiness & Cocktails | Scrapping Clearly


Hi everyone!
Today I am sharing another of my guest designer projects created for Scrapping Clearly last month.
For this one I wanted to go "back to basics" and create a fun 12x12" scrapbook layout that was focused on paper. (My love of paper is, after all, which first led me down the rabbit hole of scrapbooking.) I chose to document some fun photos that were taken a year ago at my retreat on the Sunshine Coast. 


The collection I chose to pair with my photos was the 'Good Vibes' collection from Crate Paper. This collection is full of bold, playful patterns - perfect for pairing with my retreat photos!

I began with a sheet of the Girls Night paper as my layout base, which I topped with a sheet of white cardstock, that I trimmed down to measure 11x11". This left me a nice, even 1/2" patterned paper border all the way around the edges.


I then turned to my other papers and was immediately drawn to the gorgeous All Good paper, with its rich colours, florals and sweet bird motifs. I cut a large rectangular piece which I placed vertically on the left side of my page. I then cut a smaller piece of the Hashtag paper and layered it horizontally over the top.

Next, I cut one of the stripey pattern strips from the Passion paper, which I added on top to provide a strong, horizontal line on which to place my photos.


I still wanted more layers behind my photos though, so I cut two tags from So Chill cut apart paper; punching a hole in each and then tying them with twine. These were then tucked in underneath where my photos were going to go. I also tucked a small white doily into my layers before sticking my photos down.


For my page title, I cut the large "happiness" piece from the Big Heart foil accent specialty paper and placed it below my photos. I then used some blue Pinkfresh Studio 'Boys Fort' Mini Alpha Stickers to complete my title. (These are such a cute size, and there is also a sheet of both tan and green alphas included in the pack.)


With so many busy patterns at play, my layout required very few embellishments (as the papers had already done most of the hard work for me). I reached for the remaining piece of the All Good paper I had used earlier and fussy cut one of the little birds from it. I the added it to my page using foam tape to give it some dimension.


Above my photos I added a gorgeous 3D butterfly embellishment from the One Canoe Two Globe Gallery range.
To finish off, I added a scattering of blue sequins from the Teresa Collins Urban Market Sequins pack. (These were the perfect match for the blue of our cocktails!)


That's all from me today, I hope I have inspired you to get back to basics too and create something featuring lots of pretty papers too. 
Until next time, happy scrapping! X