Thursday 28 February 2019

You & Me | Cocoa Vanilla Studio


Hi everyone!
Today I have a layout to share that was created for Cocoa Vanilla Studio for the "Throwback Thursday" feature, when team members are challenged to create something new with an older collection. I couldn't help myself but re-visit the gorgeous 'Life is Beautiful' collection from 2015, which still remains a favourite of mine. 


Butterflies (which I adore, in case you didn't already know) are a big feature of this collection, so I wanted to create a page with some large feature butterflies. I decided to use the Mixed Butterflies cut files from Cut to You, choosing three in the same design but cut in different sizes. They were cut from white cardstock and then I coloured them using Distress Oxides (Broken Glass and a touch of Twisted Citron). I backed each of the butterflies with patterned paper - using Heart Song for the two smaller ones and Blossoms for the larger one.


I cut a piece of the reverse side of the Beautiful Day paper as a mat for my photo, and backed my photo with some cardboard to mount it up. I then took a sheet of the In Bloom paper with its gorgeous floral print, and fussy cut several pieces which I set aside. (This paper just begs to be fussy cut!)

I arranged the three butterflies on my page, placing them so they formed a visual triangle around my photo; then added three floral pieces near to each butterfly to reinforce the triangle. I layered some of the edges under, and some of them over the butterflies to give variation to my layers. I also left the edges of the flowers free from adhesive so I could bend them up from the page.


On top of each large butterfly I layered a smaller butterfly from the die cut ephemera pack, which I then topped off with a coordinating enamel dot. (Although the ephemera pack is now out of stock, you could also use the butterflies from the accessory sticker sheet for this purpose.)

For my title, I used the you & me die cut from the ephemera pack; which I adhered to the bottom right corner of the photo then added foam tape behind the remainder.  I also placed the happy days flair button next to the title.


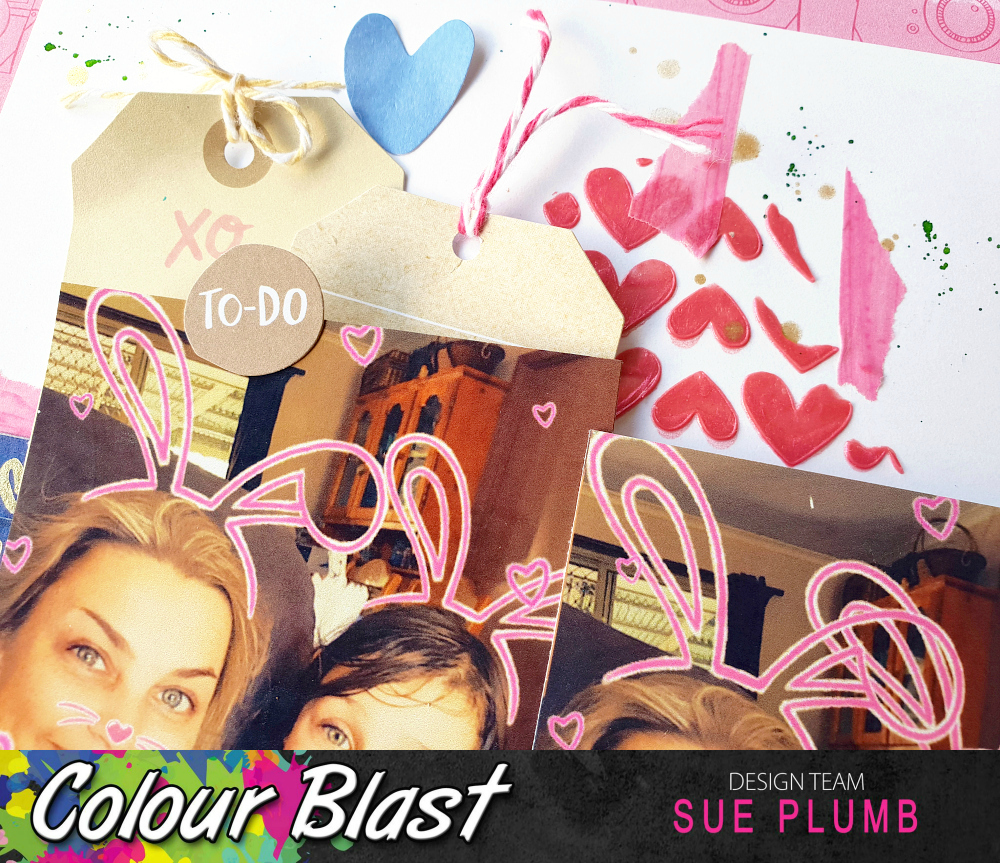
To finish off my page I added the yellow just perfect die cut banner to the top left corner of my photo; and a small yellow heart from the accessory stickers to the right side of my page. I then splattered some orange, yellow and green Colour Blast sprays and I was done!

Thanks so much for stopping by today. You can find the 'Life is Beautiful' collection in the Cocoa Vanilla Studio store HERE (And despite the fact that a number of items have already sold out from this range, you will still find more than enough coordinating pieces left to create with.)
Until next time, happy scrapping! X 

Tuesday 26 February 2019

Ethos tags | Viva Las VegaStamps


Hi everyone!
Popping in to share my latest Viva Las VegaStamps design team project with you. Today I have some mixed media tags to share that I created to showcase some of the fabulous "Ethos" stamps (from Plate #1502) designed by Tina Walker.

I was lucky enough to have a few creative days away with some of my fave peeps over the weekend, and I made these tags for my gals as a little welcome gift so they know how much I love them all. We had an amazingly relaxing few days - crafting, chatting, drinking and lots of laughing.
Here's a pic of us all together...


I began by cutting my own tags from some smooth white cardstock using a tag die. I then used Ranger Distress Oxides to create a watercolour style background. I used a combination of three colours (Cracked Pistachio; Twisted Citron and Tumbled Glass) and swiped each of the pads onto my craft mat. I then added a little water using a spray bottle and used the tip of my finger to swirl and mix the colours a little before dabbing the tags face down to soak up the ink.


I then set the tags aside to dry. I love the effect that this technique gives, and the fact that each tag was different.


Once the background colour was in place, it was time to add some background detail. I chose a variety of stamps to use for the backgrounds, stamping each one with Stormy Sky Distress Oxide.
The stamps I used for the backgrounds were:


I added a sentiment to the bottom of each tag using the Create Art Every Day stamp which I stamped using Faded Jeans Distress Oxide. I then used the same ink to stamp out each of the Ethos stamps I had chosen to feature on my tags. (You will see that many of the stamped images are "imperfect" - this is exactly the effect I was looking for by using the Distress Oxides and works well with the hand carved look of these stamps.)


With all of my feature images stamped out, I simply fussy cut around each one and then began constructing my tags. 
Using the Faded Jeans Distress Oxide gave me the inspiration to include a small amount of denim fabric on each of the tags. (I LOVE denim!) I simply cut some scraps from an old pair of jeans and used my Tim Holtz tiny attacher to secure the pieces onto the tags. 


I also added some messy white cotton thread onto each of the tags before using foam tape to mount each of the feature images on top. I finished off each tag by punching a larger hole at the top and tying another scrap of denim fabric through it.


The Ethos stamps I featured on my tags were:
- Ethos Hands (pictured above)
- Ethos Owl (at left, below)
- Ethos Flower (at right, below)


From left to right below:


And finally, Ethos Seeing Double (as shown below).


Thanks so much for stopping by today so I could share this with you, I hope I have inspired you to get inky too!

VLVS stamps used: 

Wednesday 20 February 2019

Easter Selfie | Colour Blast


Hi everyone!
Popping in with my latest Colour Blast design team project for you. Today I am sharing a mixed media scrapbook layout that features a combination of Colour Spray, Colour Paste, Colour Shimmer Spray and Colour Artist Ink.
I created this page to document a series of fun SnapChat selfies I took with my kids last Easter. (I hadn't intended on taking a series, but once you do it with one of them, they all wanted a turn being a bunny!)

Here is my layout...


And now for my process.
I began this page with a sheet of white cardstock trimmed down to 11x11" as I intended on matting my page using patterned paper. I started by applying some 'Indigo' Colour Spray to my page with a wide brush using a vertical stroke and keeping the top third of my page free from colour.


Once the spray was dry, I added some 'Punch' Colour Paste to my page, which I applied using a palette knife through a heart stencil from Flutterby Designs. I added the paste in three small sections, which I kept fairly close in to where my photos were going to be placed.
Once dry, I added some small pieces of torn washi tape to begin building the structure of my page. At this point my layout was looking like this...


Now it was time for the photos and embellishments. I dug through my stash and found some old Amy Tangerine supplies I thought would work well, so I added a few bits and pieces as layers before adding my photos on top. I then matted my page onto a sheet of coordinating patterned paper. 


As a number of the pieces I had used had gold foil on them, I decided I need to add a little gold to my background to match. I used 'Bling' Colour Shimmer Spray to add some gold splatters, which I did by flicking the end of the nozzle around my page.


Next, it was time for my page title, which I added along with my handwritten journalling, in the bottom right corner of my page. 


I still felt as though my layout needed a little extra "something" to add colour, so I used 'Grass' Colour Artist Ink and a small, stiff brush to add some very fine splatters around my page.


And with that, my page was complete.
You can see how the addition of the green ink worked in with the green that featured in the embellishments, helping to bring all the elements together.


The placement of the 'Punch' Colour Paste above and below the photos helps to draw the eye through them.


This was a fun page to put together for some fun photos. I hope I have inspired you to get some of your own memories documented too. 


Until next time, happy scrapping! X 

Friday 8 February 2019

Warrior Queen | Scrap the Girls February challenge


Hi everyone!
I hope you have all settled back into routine after the festive and holiday season. With the kids back to school here it's nice to get a bit of normality happening again. (Which means back to some regular creative time for me - yay!)

I am kicking off my design team shares this month with the February challenge at Scrap the Girls which is called "Warrior Queen" and looks like this...


There are different aspects of the board you can be inspired by - the colour palette; the quote; the image; or even the person pictured (Constance Hall). I drew on the visual aspects of the mood board to influence both my page design and my photo. I also received some goodies from one of this month's sponsors - Corbett Creations to include on my layout.

Here is what I came up with... 


I started this page with some heavy weight white cardstock, knowing I was going to be using mixed media on it. I used Colour Blast Colour Artist Inks for my background, using my favourite shades of Oasis, Slipper, Citrus and Cider to match the colour palette of the board. I applied them randomly around the central area of my page using a small brush, doing one at a time and then tilting the page up vertically to allow the colours to run down.


Once I had all the inks down, I moved onto creating some layers to go under my photo. I am still determined to bust some of my stash, so I dug out some really old Echo Park and My Little Shoebox patterned papers and die cuts and stacked them on the page randomly, securing the pile with staples to hold it in place. I also used up lots of old coordinating stickers and used them to add extra layers.    


Next, I found a Crate Paper chipboard frame to frame my photo but was disappointed to find that my photo was too narrow to fit. Never fear - washi tape to the rescue! I added some gold diagonal striped washi down each side of my photo, which allowed it to blend in with the gold edging of the frame, then a couple of smaller ripped pieces onto the frame to tie it all together. I then added it onto the paper layers I had on the page. 

For my title I used the "warrior queen" wood veneer which was kindly supplied by Corbett Creations. To alter it I simply painted it with Dina Wakley 'Peacock' acrylic paint and then adhered it on top of a speech bubble shaped die cut. 
Included in my pack from Corbett Creations, was also the pink acrylic lips, which I stuck onto the frame. This tied in perfectly with the just be happy sentiment I had added to my page. 


To finish off my page I added a few more stickers, including some chipboard ones (that really weren't even sticky anymore so I had to use glue), and a heap of enamel dots. (I really need to stop hoarding these things! LOL) I also added a few stamped sentiments and splattered some Colour Blast 'Lagoon' Colour Spray around the page. 

I was really happy how this page turned out - full of fun and colour! I hope you will join in with our "Warrior Queen" challenge this month. We have prizes up for grabs from both Cocoa Vanilla Studio and Corbett Creations for our Australian entrants, and from Scrap Accent for our international entrants. You can find all the details, plus lots more inspiration from the design team over on the STG blog HERE
Until next time, happy scrapping! X

Saturday 2 February 2019

Bloom and Grow | Cocoa Vanilla Studio


Hi everyone!
Today I have something a bit different to share with you - a whimsical style page I created recently for Cocoa Vanilla Studio using the gorgeous 'Midnight' collection and a fabulous Cut to You cut file from Created by Gwen

The inspiration for this page came when I took this photo of my daughter in her new swimmers. The sun was shining on her face and her legs were in shadow; and as soon as I saw it, I immediately thought of the stunning 'Sunset Strip' paper from the 'Midnight' collection. (Please tell me that I am not the only one who sees a photo and it makes them think of paper that would match?! haha)


So my page began with a sheet of 'Sunset Strip' as my base and a sweet photo of my daughter. I wanted to remove as much distraction as possible so I fussy cut around her silhouette to remove the background from the photo. Looking at it made me think about how quickly she was growing up, and blossoming - so the idea to turn her into a flowering plant was born.


I decided to use the 'Open Leaf' cut file from Cut to You as my branches / wings and coloured them using Ranger 'Stormy Sky' Distress Oxide. (If you don't have a cutting machine, you can purchase these cut files already cut HERE and Gwen will send them to you!) I then backed them using the beautiful tiny floral pattern on the reverse side of the 'Inky Depths' paper and set them aside. 


I used the gorgeous little mason jar from the Chipboard Accents pack as my "pot", and then placed my photo so she was growing from it; adding the sweetness label from the Die Cut Ephemera pack and a little chipboard heart on top. I then created a little layered "garden" around my pot using assorted blooms from both the ephemera and chipboard accent packs. 


I then tucked the two branches in behind the photo, positioning them so that they would look like a pair of wings. I then cut a small floral feature from one of the ephemera pieces, placing it on her head like a flower crown and topping it with a small chipboard heart. I also added some extra leaves from the ephemera pack, tucking them in around the edges of the wings.


I used the bloom and grow piece from the ephemera pack as my page title, adding it in the bottom right corner of my page. I then added a few flowers from the Clear Stickers pack to the edges of the wings, and two little heart stickers to the points where the wings joined her body.


I used some small word stickers from the Accessory Sticker sheet to add the sentiment onto the wing, and a small butterfly sticker just beneath it. 
To finish off my page I splattered some Colour Blast 'Bubblegum' Colour Spray, and added a scattering of pale blue sequins that I had left over from the 'Hello Lovely' collection in my stash. 

That's all from me today, thanks for stopping by so I could share this with you. 
Until next time, happy scrapping! X