Showing posts with label mini album. Show all posts

Thursday, 12 March 2020

Hello You ~ Baby girl mini album | Cocoa Vanilla Studio


Hi everyone!
Today I am sharing a special mini album I created a little while ago for Cocoa Vanilla Studio using the beautiful 'Midnight' collection. This baby girl album was made for my daughter to tell the story of her birth and the weeks in hospital following. 


I began this mini album with an unbranded 6 ring pink planner I purchased from eBay. This planner came completely empty, and unlike the last planner I used (which was from Kmart), this one features a magnetic clasp to close it, rather than the elastic band. I also used an adjustable 6 hole punch (also purchased from eBay) that I set up to fit the rings in the planner.


I used pieces from most of the patterned papers from the collection, cutting a variety of sizes and shapes to use for the pages. I then punched each one with the hole punch, ensuring they were not all aligned the same so that they would sit at varying heights within the album. I also added some additional decorative detail to some of the pages using an assortment of border punches.

I created “tip-ins” for some of the pages using patterned paper adhered with washi tape. This allows you to extend on the amount of space you have on a page to add extra photos or journalling, or even hide journalling underneath, just like I did with my daughter’s birth story above.


Remember you don’t always need a photo on each page – it adds extra interest to an album to intersperse purely decorative pages, or pages that simply feature a sentiment throughout, such as the page featuring fussy cut flowers from the Bloom and Grow paper and a Die Cut Title word above.


Another way to help anchor photos into an album and ensure they appear as a cohesive part of the page design, rather than just stuck over the top, is to add embellishments that overlap part of the photos. Alternatively, don’t be afraid to use an entire photo as a page in itself and punch directly through the photo. (Matte photos tend to work better for this, rather than glossy.)


To continue to provide variety throughout the album, try turning some of the elements vertically on the page; or have a horizontal page opposite a vertical one. (It also adds an extra level of interactivity to have people rotate the album to look at them.)


A great way to include a series of photos is to print them as a photo strip and fold them accordion style with a tab sticker to pull it out with…


The photos fold out and then fold neatly back into the album, only taking up the same amount of space as one photo.


Create small pockets from scrap pieces of paper to hold journal tags. For a final interactive element, I uploaded a video taken during the drive home from the hospital with my daughter to my YouTube channel (set as private) and then created a QR code for it. This allows it to be scanned by a QR code reader on a phone that links to the video and plays it. (My children LOVE these!)


There is much more to this album than I could show here. If you would like a look at the entire album, I have a flip through on my YouTube channel you can watch below:


That's all from me today, I hope I have inspired you to try making your own mini album in this style - they are so much fun to do!
Until next time, happy scrapping! X

Wednesday, 27 November 2019

"Epic Adventure" Mini Album | Scrapping Clearly


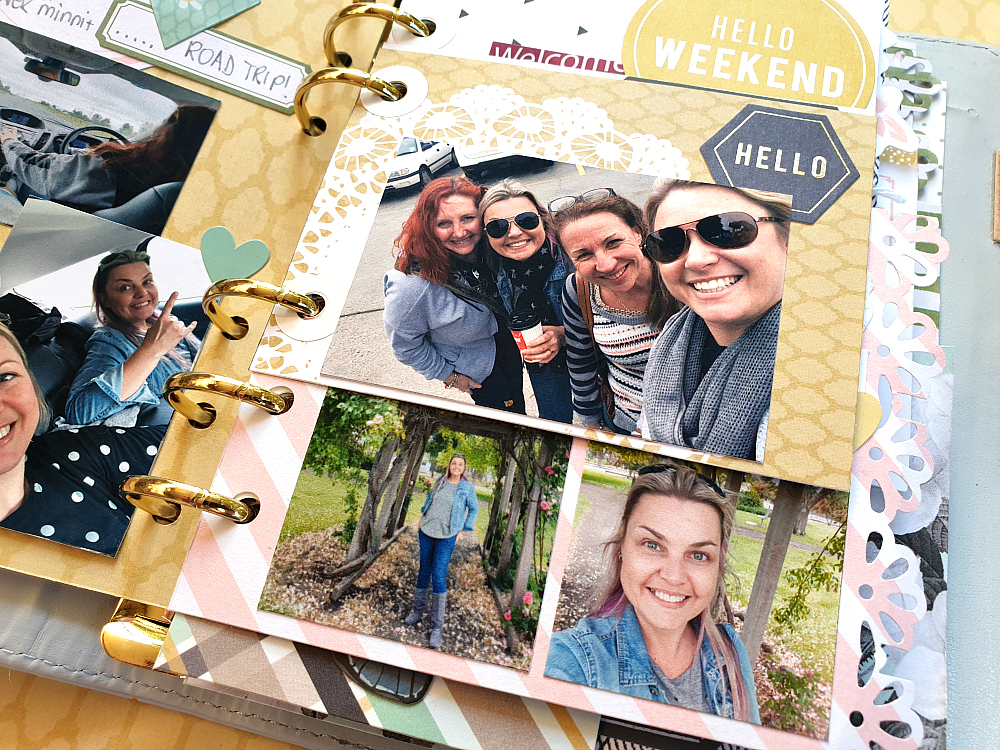
Hi everyone! Back again to share my final project that I created as a guest designer for Scrapping Clearly last month. Today I am sharing a special mini album I created to document an epic adventure I had with my sister - a surprise weekend away to celebrate her birthday that was organised by her partner (and a few sneaky scrappy gals!)


There is so much to love packed into this album - not just the memories, but some beautiful products too. I have found myself using a lot more patterned papers lately, and falling in love with paper all over again.

So, let's get started on this album. I began with a pile of photos and a small 6 ring binder-style planner I purchased at Kmart. I opened it up and removed everything from the inside, leaving me with the cover only. 


I started by making myself a "kit" of coordinating items to work from that included a variety of patterned papers; stickers; and die cut ephemera.


I chose a number of patterned papers from the Simple Stories 'Heart' and Heidi Swapp 'Emerson Lane' collections; with some odd sheets from Pink Paislee and Websters Pages added in. My main criteria when choosing the papers for my kit was colour choice - with both the A and B sides of each one needing to fit my chosen palette. 


I started by cutting the sheets of paper into smaller "pages" - trimming each one into a variety of different sizes and shapes. I then used a few different decorative border punches to punch along some of the edges. 


Now it was time to sort the pages into some sort of order. I shuffled and stacked them, making sure that the sizes were mixed up and that colours and patterns on facing pages were complimentary to one another. I then punched each page using an adjustable 6-hole punch; adding some hole reinforcer stickers as I placed them into the binder.


With all of my pages in place, it was time to start adding my photos. (I do admit that the order of the pages did get shuffled a little as I began to work my way through the book.)


I treated each page just like a tiny scrapbook layout - I had a background, photo/s and now they just needed embellishments. I didn't want to use anything bulky because I wanted to make sure the pages would lay flat, so I chose a mix of stickers and die cuts to use.


To coordinate with the papers I had chosen, I used the Simple Stories 'Heart' Cardstock Stickers; and the Heidi Swapp 'Emerson Lane' Stickers and matching Ephemera. 


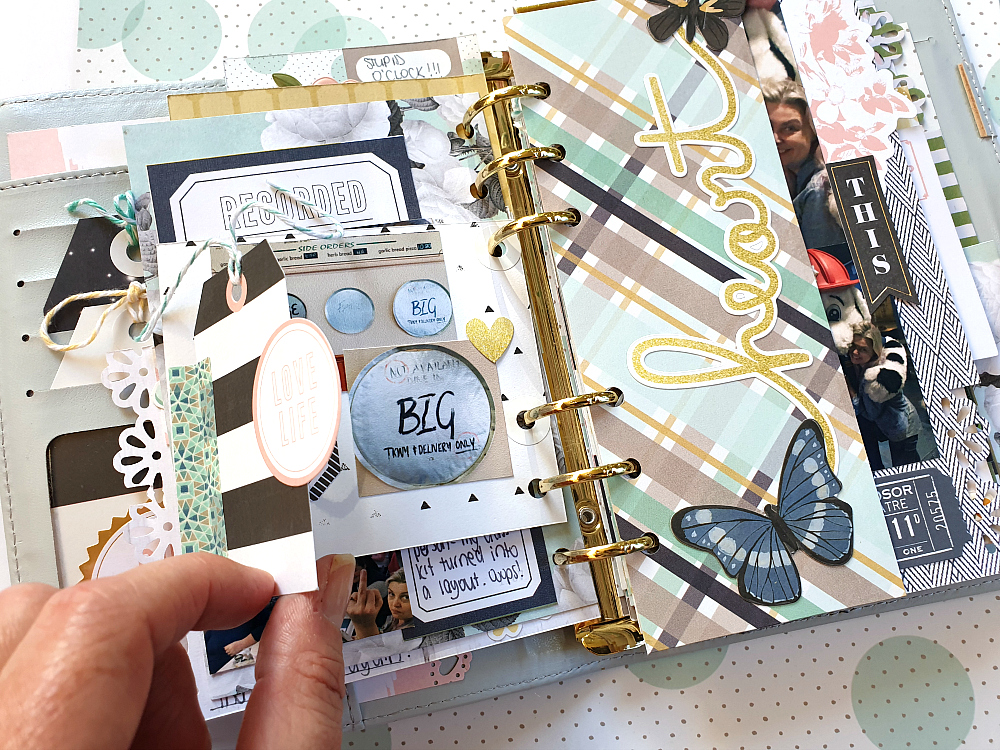
Throughout the album I added extra interest to some of the pages by adding "tip-ins" (extra interactive flaps) using tags / ephemera / pieces of paper, which I fastened with washi tape. (There is even a set of coordinating 'Emerson Lane' Washi Tapes!)


I left some of the pages in the album photo-free and kept them simply decorative. You can see how having a good variety of different page sizes, colours and patterns adds plenty of visual interest.


I did choose a couple of embellishments that were slightly dimensional to use in my album - the super cute Pebbles 'Spring Fling' Puffy Stickers - Flowers; and the 1 Canoe 2 'Globe Gallery' 3D Butterflies.


I made an effort to include handwritten journalling on as many of the pages as I could - using a variety of labels, journal tags and even paper offcuts to write on.


Another way to switch things up in the album is to add the photos sidewards - just as I did with the landscape shot, which allowed it to be printed larger.


Never be afraid to punch directly through a photo to turn it into a page itself; and when dealing with small pages, sometimes it is better to embellish over part of the photo.


When working on a small scale like this, especially with papers featuring bold patterns, it is better to keep to the "less is more" rule with embellishments.


Look at the papers you have and see what can be fussy cut from them to use as embellishments, such as flowers, labels, shapes and quotes.


Design tip: to help your embellishments stretch further, cut things such as label stickers in half. The irregular shape also makes it more interesting to look at.


Another way to add extra interactive elements to your album is to include small envelopes, which can be used to hold memorabilia, journalling or even extra photos (just like I did in my special "sealed section").


This is by no means all the pages from my album - there are just too many pages to share here (and some still to be completed). Once I have them all finished I will try and film an album flip through to share with you on my YouTube channel and in the Scrapping Clearly Facebook group. 

A big thanks to the gorgeous Kylie and the team for having me as a guest - I so enjoyed creating and  sharing my projects with you.
If you would like to shop up a storm in Kylie's store, you can find it HERE
Until next time, happy scrapping! X

Sunday, 12 August 2018

Travelers Notebook Pages | Viva Las VegaStamps


Hi everyone!
Popping in with another catch up design team project to share with you.
Recently my kids had their winter school holiday break; and as much as I loved spending extra time with them, it did make it more difficult to find time to create than usual. It also meant that every time I did, my mini crafters were right there sharing my space. The solution was to work on a smaller scale, so I switched to working in a travelers notebook.
The beauty of working in the travelers notebook, meant I was able to create these pages with far less supplies than I would usually use for a traditional scrapbook layout. (It's also a great way to use up some of those phone photos that aren't the best quality as they are printed in a smaller size.)

Here are a couple of pages I created documenting some daily moments...


The process for creating the pages was simple. I started by deciding where my photos were going to be placed and then just sat them on the page without sticking them down. I then tore some pieces of washi tape and added them to the page to provide some structure to work from, and also a splash of colour. Next, I chose a stamp as my focal image that supported the theme of my photos and began constructing the page. 


For the bike riding page I chose the Whimsical Wheeley Dog as my main stamped image, and She Spread Her Wings as the title. I added the Let Fear Be quote at the bottom of the page; and the I Do All My Own Stunts quote at the top of the page; then used the Row of Chevrons stamp to draw attention to the title and main photo.  


I used Miracle Tape to fix my photos my photos in place before adding my handwritten journalling with a felt pen. Watercolour pencils were used to add colour to the page, which were blended out with a water brush. To finish off, I used the Doodle Dots stamp and green ink to add some extra interest, and tie in further with the green spotted washi tape I had used. I also stamped the date.


For my second page, which was about our outing to see "Hotel Transylvania" at the movies, I followed the same process as for the previous page - first deciding where my photos would go, then adding the washi tape before moving onto the stamps. 

To tie in with one of the characters from the movie, I chose the Mummy stamp as my main focal image. I also stamped the Freaks stamp several times for the title of my page. I then looked for other stamps that supported my theme, choosing the Blood Dripping and Escape stamps to use in the top part of my page. To draw attention to the main focal image, I used the Row of Chevrons stamp.


For the bottom portion of my page, which was about our trip to McDonalds after the movie, I used the Oh My! and Biohazard stamps. (Not sure McDonalds would appreciate the humour in that one! haha)
I then followed the same process to finish as for the previous page - fixing my photos in place with Miracle Tape; adding my journalling; using watercolour pencils to add colour; then stamping the date and adding extra interest with the Doodle Dots stamp.

Thanks for stopping by today so I could share this with you.
Have you tried working in a travelers notebook before? If not, I would highly recommend giving it a go! There are no limits to what you can create - you can use it for documenting memories like I have here; for making lists; or even like a mini art journal. The scale is perfect for stamping, and I know they will be fun to look back through in future.
I hope I have inspired you to get inky too!
Until next time, happy scrapping! X