Thursday, 29 April 2021

Bloom | Kitaholic Kits April 2021


Hi everyone, 
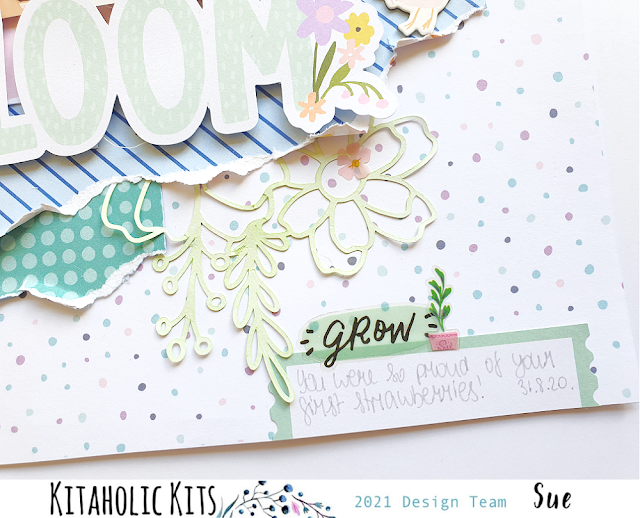
Back again to share my final project for Kitaholic Kits using the April 2021 kit. This project was inspired by the Simple Stories 'Bunnies and Blooms' items that were in the kit, which had a very Spring / gardening vibe to them. I thought they would work well with some photos of one of my boys that I took when he picked his first homegrown strawberries. (He was so proud!)


I started with one of the Studio Light papers for my background featuring small spots in blue, pink and purple. I then pulled pink, blue and lilac papers (from Studio Light and Obed Marshall) from the kit to match and created some layers to go underneath my photo. I also added a piece of the teal paper to tie in with my son's shirt in the photos. Besides the papers, I also tucked in a blue paper doily and some frayed gauze from my stash. 


Once I had the papers in place, I pulled out some cut files that I had laying around. These were floral design ones that I had cut previously and had gone into my "miscut" pile. (Some had a bit of fraying, parts not cut properly, etc.) These were all subscriber exclusive cut files from a previous kit (I think November or December?)


I took the cut files and cut them into pieces with the intention of tucking them in amongst my layers. I first decided to colour them though, so I took the green Heidi Swapp chalk ink from the mixed media add-on kit, mixed it with a little water and used a brush to paint it on. I then tucked the pieces in to help frame around my photos.


For my page title, I used the large bloom word from the Simple Stories 'Bunnies & Blooms' Page Pieces pack, which I ran across the bottom edge of my photos. I then embellished around my photos using more of the die cuts from the same pack mixed with some of the coordinating 'Bunnies and Blooms' chipboard stickers. 


I also added some stickers from the Maggie Holmes 'Garden Party' sticker book and wrote my journalling on a small label in the bottom right corner of the page.

I really love how this layout turned out! (And most importantly, my son does too.) If you'd like to see how I created it, you can watch my process video here:


That's all for my April kit shares, I'll be back again soon with a fresh kit and some new projects. Until next time, happy scrapping! X

Monday, 26 April 2021

The Best Time | ANZAC Day Cyber Crop for Kitaholic Kits


Hi everyone,
Today I am popping by to share a layout I created for the Kitaholic Kits ANZAC Day Cyber Crop. My challenge to everyone was a "Mixed Media" challenge. Here's a look at my challenge criteria...


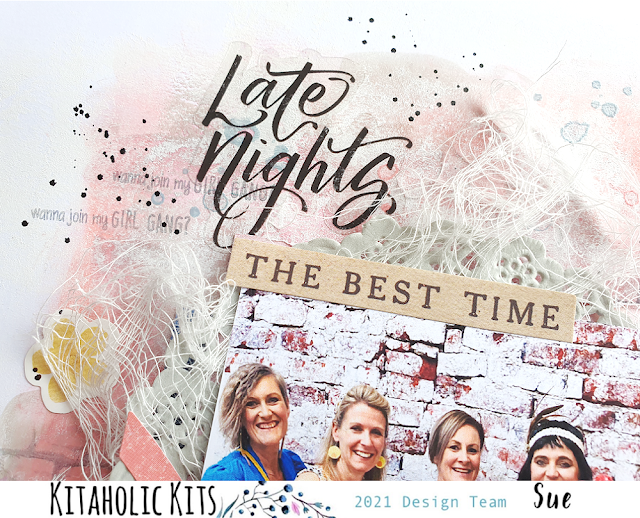
I decided to delve into some of my previous kits and pull together some items for my layout. I chose to document a photo that was taken at my retreat at the end of 2019 with the girls from my table on theme night. I so love these girls and cannot wait to get together with them again later in the year. 


I began my layout with my background, using a sheet of white cardstock and some acrylic paints. I used a dusky pink Kaisercraft one that came in a previous Kitaholic mixed media add-on kit, along with a Mont Marte dimensional paint and a couple of Dina Wakley paints from my stash. I used a combination of silicone spatula, rubber brayer and my fingers to apply the paints to the page, with each one giving a different effect and level of coverage.


I then used a grey ink and a brick pattern stamp from Viva LasVegaStamps to add some extra interest to my background. I also added splatters using Dina Wakley Gloss Sprays. 


The patterned papers I used were a mix of Vicki Boutin and Heidi Swapp. I cut, tore, and distressed the pieces to create layers under my photo, adding a grey paper doily from my stash. I also added frayed gauze for soft texture.


For my embellishments, I used a three fussy cut butterflies that I cut from a Vicki Boutin paper; and a mix of Vicki Boutin and Heidi Swapp stickers (both cardstock and clear). I particularly love using clear stickers over a mixed media background, as it still allows the layers underneath to show through.


For my journalling, I used my typewriter on a journal card from the Vicki Boutin cut apart paper. I finished off my page with some stamped phrases and a final splatter with some black ink.

You can watch my process video and see this page come together here: 


That's all for today, thanks so much for stopping by. Until next time, happy scrapping! X

Saturday, 24 April 2021

Naughty or Nice | Cocoa Vanilla Studio


Hi everyone,
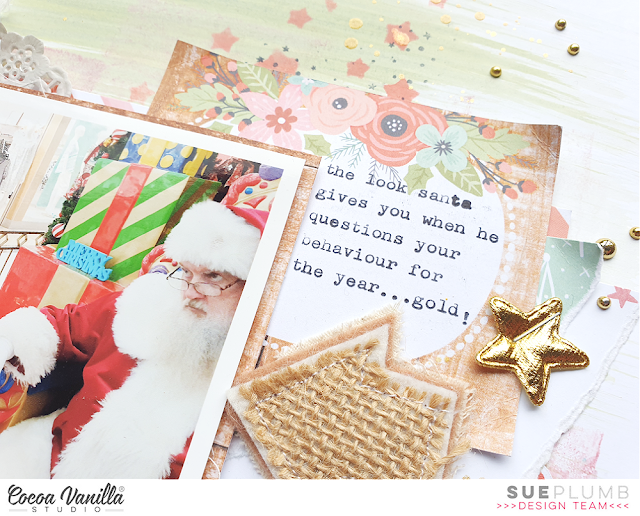
Today I am sharing a layout I created recently for the Cocoa Vanilla Studio design team using the 'Merry and Bright' collection. I was tasked with the "Throwback Thursday" feature, when one of the design team creates something new with an older collection. I didn't delve back too far for this range, however those that know me might be falling over in shock that I created a Christmas page. I had this hilarious photo of my boys with Santa that I just HAD to document though.


For this layout, I decided to create a mixed media page, so I started with white cardstock, acrylic paint and some Distress Oxides. I first used a wide paint brush to brush the diluted green Distress Oxide across the page, then used a rubber brayer to apply pink paint to the lower half of the page. Next, I added some stencilling using a star stencil, sponge dauber and a coral coloured oxide; then topped my background off with some stamping using a star background stamp and grey ink.


After the background was complete I mounted it onto the wood grain print of the Season’s Greetings paper, then started building the papery layers on my page. I cut and tore pieces of the Star Bright and Countdown papers, as well as the diagonal pink/red stripe paper from the A5 Paper Stack. I used my fingernail to ruffle up the torn edges to add extra texture.


I layered my paper pieces together, adding a grey doily from my stash and some frayed gauze for even more texture, and then secured the stack together with staples before adding my photo on top.

To embellish my page I focused on creating 3 main clusters. The first was in the top left hand corner of my photo, where I had a spot on the photo that had to be covered up anyway. I did this by using a couple of stickers from the Accessory Sticker sheet and just sticking them directly onto the photo. This cluster also featured a pair of sweet little houses and flower from the Die Cut Ephemera pack and one of the Puffy Gold Stars.


The second cluster was along the bottom edge of my photo and I again used die cuts and a gold star, plus some phrase stickers from the Accessory Sticker sheet.

The third cluster to the right of my photo was where I included my journalling, which I typed onto one of the coordinating Pocket Cards. I also added a small die cut sprig of holly; another gold star and a handmade arrow embellishment.


I finished my layout off with some gold adhesive pearls and some splatters of gold mist.

If you would like to watch this page come together (and listen to some of my waffle), then make sure you pop over and watch my process video on my YouTube channel here:


That's all for today. Until next time, happy scrapping! X

Thursday, 22 April 2021

Easter '20 | Kitaholic Kits April 2021


Hi everyone,
Today I am sharing my third project using the Kitaholic Kits April 2021 kit and mixed media add-on kit. This time, I was inspired by the sweet little motifs in the Maggie Holmes 'Garden Party' sticker book, that had me thinking of sweet treats and Easter, so I decided to document some photos of my kids from Easter morning last year. 


The challenge of working with the stickers from this book on a 12x12" layout is that the stickers are a pretty small size, so I knew I had to scale things back on my page to suit them. I printed four photos, each one 3x4", to allow me to have multiple photos on the page without overwhelming it. I also knew I had to keep the focal area of my layout in relatively tight so the stickers wouldn't get lost. 


For my background, I used white cardstock and one of the Heidi Swapp chalk inks from the mixed media kit. I swiped the ink pad back and forth across my page, then used a wide brush loaded with water to blend the ink out. 

The stencilled detail was added later using a stencil from Obed Marshall (also from the mixed media kit), a sponge dauber, and my Peacock Feathers Distress Oxide.


Over the top of the ink I added a narrow, vertical piece of patterned paper to define the area where my photos would go, then tucked in some tags that I had hand cut from another paper (both of these were Obed Marshall 'Buenos Dias' papers). I also tucked in a mini doily and some small scraps of paper I had left from my previous project. My cardstock was also bordered with one of the Obed Marshall papers.


Besides the Maggie Holmes sticker book, the other embellishments on my layout were a mix of the coordinating Maggie Holmes 'Garden Party' Thickers, and gold Thickers - both also included in the kit. I finished off with some stamped phrases using a roller stamp from my stash and Teal Archival ink, and of course, a few splatters!

You can watch exactly how this layout came together in my process video:


Thanks for popping by today so I could share this with you. Until next time, happy scrapping! X

Sunday, 18 April 2021

Hello Sweet Sunshine | Kitaholic Kits April 2021

Hi again everyone! It's time to share another project created for Kitaholic Kits using the fabulous April kit. For this layout, I was challenged to dust off some under-used tools from my stash so I pulled out a couple of border punches and an old stencil and combined them with my kit to create something new.


For this page I decided to document my huge love of coffee with a selfie that I took one morning with my favourite coffee cup. Because of the bold black tones in my photo, I started with the black and white checked paper from Doodlebug Design as the base for my page. I cut out a large piece from the corner that I knew wouldn't be seen and set it aside to use for another part of my page. 


Over the top of the black and white check, I added a large piece of the yellow spotted paper, which is from the Obed Marshall 'Buenos Dias' collection. I used an old Martha Stewart punch to punch the heart detail along one edge. 


For my sunburst pattern, I used the grey wood grain print from the reverse side of the black & white check. I used an old Studio Calico stencil as a template and traced the rays by hand. I then layered them over the yellow paper and positioned them so they would radiate out from the right side of my photo. Over the top of those, I used a scrap of the yellow paper and a Fiskars scallop punch to punch out some scalloped lines. These provided the lines for my gold title words, which were from the Maggie Holmes 'Garden Party' Thickers pack in the kit.


My photo was matted with a pale pink Obed Marshall paper to draw some pink into my colour palette and help soften it a bit. Behind it I added a charcoal coloured doily, and some frayed gauze for texture. Along the bottom edge I added the gold scallop to tie into the punched scallop pieces.

For my embellishments, I used a mix of the puffy icons from the 'Garden Party' Thickers pack, which included florals and the sweet little tea cup (which I figured was close enough to a coffee cup).


 I finished off with a few small stickers from the 'Garden Party' sticker book; some wood veneer hearts which I coloured black using a Sharpie; and some black splatters of Liquitex acrylic ink.
A bit of a different style for me, but I enjoyed the challenge of pulling out some punches, which is something I haven't done in a while.

If you would like to watch my process video for this page, you can see it here: 


Thanks for stopping by today. Until next time, happy scrapping! X

Wednesday, 14 April 2021

Hey Bunny | Kitaholic Kits April 2021


Hi everyone! Today I am happy to be sharing the first of my projects using the Kitaholic Kits April kit and mixed media add-on kit. (If you would like to see the full contents of the kit, check out my unboxing video HERE.) This month's kit has some lovely pastel / Spring vibes that I thought would be perfect for documenting Easter, I decided to kick things off with a pretty Easter-themed layout documenting some fun selfies my daughter and I took together on Easter Sunday last year. 

I started my page by creating a mixed media background on a sheet of white cardstock (that I had cut down to 11x11"), using one of the Heidi Swapp chalk inks from the mixed media kit. I simply swiped the ink across my page randomly then used a wide brush loaded with water to blend it on the page. I then used a Distress Oxide from my stash (the new Kitsch Flamingo colour) and a sponge dauber combined with the floral design stencil from the mixed media kit to add the pattern over the top. I then topped it off by using a Dina Wakely Gloss Spray (from the March mixed media kit) to add some splatters over the top.


With my background done, I then mounted it onto the pretty lilac paper from Studio Light to form the border for my page. (I cut out the middle to retain it for another project.) I then created some layers using some of the other papers from the kit to go under my photos.


To embellish my page I used a mix of items from the kit that included the Simple Stories 'Bunnies & Blooms' chipboard stickers and die cuts; the Maggie Holmes 'Garden Party' sticker book and puffy Thickers pack.


I also used a pretty handmade heart embellishment from Charms Creations that I layered with the "XO" from the Thickers pack. 


I finished off my page with handwritten journalling, some stamped phrases and some black ink splatters. 

This page was a bit different for me - not only for the pink and purple colour palette I used, but also for the fact that I strayed from my usual "visual triangle" design and opted for a horizontal style flow instead.

If you would like to watch this page come together, make sure you check out my process video here: 


I'll see you again soon with another project. Until then, happy scrapping! X

Sunday, 11 April 2021

Cheers to the Weekend | Cocoa Vanilla Studio


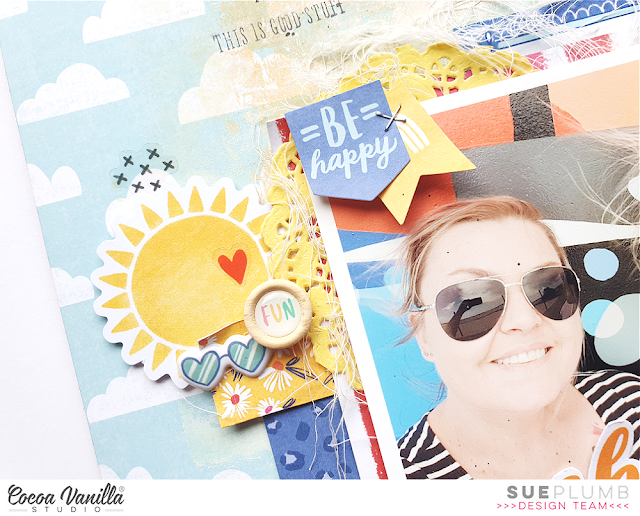
Hi everyone, today I am sharing a fun mixed media layout I created for Cocoa Vanilla Studio using the new 'Sunkissed' collection. For this page, I decided to document a photo of myself and my sister that was taken when we snuck off for a last minute weekend away late last year. Just us, peace and quiet, cocktails, snacks and lots of scrapping with ocean views. It was sorely needed after the forced cancellation of our annual retreat due to COVID, and pure bliss!


I started my page with the Just Chillin' patterned paper, which features the sweet cloud print. Before I did anything else, I wanted to tone down the pattern in the centre of the page, where the focal area of my layout was going to be. I used white and yellow acrylic paint, which I applied lightly with a brayer, which softened the pattern enough, but not so much that you could still see through it. Once that as done, I turned my attention to creating some papery layers.


I started with a couple of papers from the A5 Paper Stack first - a yellow chevron, and a blue animal print. (These two papers are exclusive to the A5 Paper Stack, so cannot be found in the 12x12" Collection Kit.) I chose the yellow and blue because the combination of these colours just screams "beach" to me. I tore both the papers and layered them, adding a strip of the pretty yellow floral from the Fun in the Sun paper on top. I then added a piece of the striped Good Vibrations paper, a small yellow doily, and some frayed gauze, before finishing the stack with my photo on top.


The next item I reached for was the Pocket Card pack. Pocket cards may not be something you would usually reach for when creating a traditional 12x12" layout, but I love how versatile they are! I used one cut in half to add an extra layer in behind my papers; a card for my typed journalling; and a third card that I fussy cut my title from. My title was also popped up on some foam tape to give it some dimension.


To embellish my page I used several pieces from the Die Cut Ephemera pack including the small feeling fine banner; the tab and flag on the corner of my photo; a couple of clouds and the cute sun. I also used the gorgeous rainbow arrow from the Accessory Sticker sheet; a small Wood Button; some Clear Stickers; and a few cute Puffy Stickers


I finished my page with some black ink splatters (and yes, some got on my photo! haha); and some stamped phrases using a roller stamp. 

If you would like to watch how this page came together, you can watch my process video here:


Thanks for stopping by today so I could share this with you. Until next time, happy scrapping! X

Friday, 9 April 2021

Brothers Love | Scrappy YouTubers Lift-a-thon


Hi friends! I've got an extra project to share with you today - a layout that was created for the Scrappy YouTubers Lift-a-thon. (I know, it sounds kind of strenuous doesn't it? I promise it's not!) 


This huge YouTube hop has a long list of very talented participants and I was so happy to be able to take part. For the hop, each participant scraplifts a project from the next person on the list, which means there is a new video going up every day for well over a month. (You can find the full list of participants and a link to each of their channels in my video description on YouTube.)

I was tasked to scraplift a project by the lovely Joanne Bartell, and below is a shot of the pretty layout I chose to lift.


I decided to put my own spin on Joanne's page by creating a boy page for my layout, and I used the 'Legendary' collection from Cocoa Vanilla Studio.


I documented a sweet photo of my boys that I took one day when one of them wasn't feeling well.


Besides the 'Legendary' collection, I also added some mixed media to my page using a Distress Oxide with a cool stencil from StencilGirl, and some stamping using one of my favourite background stamps from Viva Las VegaStamps
 

I added texture to my page with the use of frayed gauze, and included metallic elements of wire and staples to help give it a masculine feel.


I also included a handmade star embellishment from Charms Creations, which I layered with the Cocoa Vanilla flair button. 

I was so happy with how this layout turned out - I do love a good boy page!
If you would like to see exactly how this all came together, make sure you pop over and watch my process video. (And don't forget to visit all the participants as the hop progresses too.)


Until next time, happy scrapping! X

Saturday, 3 April 2021

Cheers | Kitaholic Kits March 2021


Hi everyone! I've got another layout created for Kitaholic Kits using the March kit to share with you today. This layout was inspired by the beautiful teal paper that I used for my background as it immediately made me think of this series of photos, specifically because it was the same colour as the cocktails we were drinking. These photos were taken during a girls weekend away and feature me, my sister Mandy, and my dear friend Fiona Paltridge. Traditionally I wouldn't use so many photos on one layout, but when I looked through them to pick the ones I wanted to use, I couldn't bear to part with any of them because I love them all so much! So that's how I ended up with SEVEN on my page. 


I was so lucky that I got to "double dip" this month, given that I was already able to use the 'Sunkissed' collection on behalf of Cocoa Vanilla Studio, and then also with this kit for Kitaholic Kits.

Besides the gorgeous teal Sunny Days paper I used for my background, I also had a couple of torn pieces of the cloud print Just Chillin' paper that I had left from a previous layout. I decided to use the two of them to frame in my layout from the two outer edges.


I used white acrylic paint and my wide #4 brush to apply some paint to the centre of my page. This helped to "pull back" the colour a bit and also define the focal area of my page. I used small yellow paper doilies in place of patterned paper behind my photos, as I liked the way the rounded shape of the doilies cut through all of the straight lines from the photo edges. They also helped to define the flow of my photo series. 


To embellish my layout, I went with my preferred method of three main embellishment clusters to form a visual triangle around the focal point of my page. Given that I had so many photos, I settled for as close as it was practical to have these placed so that almost all of the photos fell within the triangle.


I built my embellishment clusters using a mix of pieces from the Die Cut Ephemera and Floral Ephemera packs. I also placed a few of the Accessory Stickers around my page.

For my page title I used the word cheers from the Glitter Foam Titles pack, and added a small gold heart from the pack into each of my embellishment clusters. I underlined my title using one of the brush stroke stickers from the Clear Sticker set, then used a few small hearts and a row of chevron stickers from the same set.


I finished off with some stamped phrases and some tiny splatters of Liquitex black acrylic ink. I am so happy with how it all came together and the fact that I have finally done justice to this epic series of photos! I hope I have inspired you to scrap a multi photo layout too. 

If you would like to see how I put this layout together, you can watch my process video here:


Until next time, happy scrapping! X