Showing posts with label Pink Paislee. Show all posts

Monday, 31 May 2021

Just Breathe | Kitaholic Kits May 2021


Hi everyone, 
Today I am sharing my fourth and final project created with the Kitaholic Kits May kit, and it is also my final project as a member of the design team. For this layout I wanted to focus on the Heidi Swapp goodies and play on the earthy tones of the kit, so I decided to document a photo I took at the Grand Canyon a couple of years ago. 


I started my page with a sheet of patterned paper from the Heidi Swapp 'Carefree' collection, which featured a soft, sketchy floral print. I wanted to add some extra warmth to the background, and also tone down the print in the centre of my page, so I applied some yellow and white acrylic paints using my brayer. 


For my papery layers under my photo, I also used pieces of the Heidi Swapp 'Carefree' papers, as well as one of the white paper doilies from the kit. I also added some frayed gauze for texture, then popped my photo up on some cardboard to help separate it from the background. I added a phrase sticker along the bottom edge of my photo, which is something I often do. 


I used papers from the kit to trace and cut my own tags, which I tied off with bakers twine and tucked into the layers behind my photo. My journal card came from the 'Carefree' ephemera pack and I tucked that into my layers as well. I added the wander far & wide vellum piece to my journal tag using a Kmart tape runner (which is my preferred adhesive for vellum pieces as it's virtually invisible). 


 To the right of my photo I created a cluster using more of the ephemera pieces and a wood veneer heart from a previous kit. Below my photo was where my title was placed and I used a combination of one of the die cut words from the ephemera pack as well as some of the raw chipboard Thickers from the kit. 


I finished off my page with some of the Bo Bunny enamel dots, a few stamped butterflies using the Pink Paislee stamp set, and a little bit of inky splatter.

If you would like to watch how I put this page together, you can watch my process video here:


I have really enjoyed the challenge of working with these kits, and am happy with the projects I made with them. I have no idea what is in store for me next on the creative front, but I'll be sure to keep you posted here.

Thanks for stopping by today, I'll see you again soon. Until then, happy scrapping! X

Monday, 17 May 2021

Together | Kitaholic Kits May 2021


Hi everyone, today I have another Kitaholic Kits design team project to share using the May kit and mixed media add-on kit. My inspiration for this project came from one of the Vicki Boutin stencils in the mixed media kit - the floral pattern. As soon as I saw this stencil it had a real "retro" vibe to me, and I knew I wanted to pair it with an old childhood photo. I found a photo of my sister and I and thought that the painted style paper from the Heidi Swapp 'Carefree' collection in the kit would work well as my page background. 


I used a sponge applicator and my Tattered Rose Distress Oxide to add some of the floral pattern through the Vicki Boutin stencil in three areas of my page. I love the way it added extra depth to the background paper and I was impressed with how the Distress Oxide looked on top of the colour variations on the paper.


Next, I moved onto creating some paper layers for the focal area of my page. I added some torn pieces from some of the other Heidi Swapp papers in the kit, and added a mat to my photo as well. I layered them together, adding a paper doily from the kit and some frayed gauze from my stash, before placing my photo on top. 


To the left of my photo, I used a gold foil edged journal card from the 'Carefree' Ephemera pack with my typed journalling on it; along with a circular gold foil phrase piece and leafy branch from the same pack. Along the bottom edge of the photo I added the gold foil happy with you phrase sticker.


To the right of my photo I added more ephemera pieces including a tag (which I tied with twine), gold foiled flower and small gold heart. I used the word together from the Cardstock Sticker sheet as my page title, adding some foam tape under it to pop it up from the page. The wood veneer heart was from a previous kit and I think the small splash of natural texture it brought to the page worked really well.


 I finished off my layout with some stamped butterflies from the Pink Paislee stamp set in the kit. I used Bundled Sage and Stormy Sky Distress Oxides for them. The final touch was splatters of Heidi Swapp Color Shine in Navy and Dina Wakley Gloss Spray in Mineral, plus a few stamped phrase using a roller stamp from my stash. 

If you would like to see it come together, you can watch my process video here:


Thanks for stopping by, I'll be back soon with another project to share. Until then, happy scrapping! X

Saturday, 8 May 2021

Fresh Cut | Kitaholic Kits May 2021


Hi everyone,
Today I have a mixed media layout to share for Kitaholic Kits using the new May 2021 kit and mixed media add-on kit. For this page I was documenting some photos of one of my boys that I took just after he got his haircut; which I had collaged together to form a 4x4" square. Taking my colour cue from the photos, where the green grass in the background was the dominant colour, I decided to create a layout with green as the dominant colour.


So I began my page with a sheet of 300gsm white cardstock and some acrylic paints. The first one I started with was a Heritage Green from Kaisercraft. I used my Kmart silicone spatula to spread the paint over the background, then applied Mont Marte Titanium White over the top using a brayer to strip the colour back a bit in places. This also provided me an area where I could add some stencilling using one of the Vicki Boutin stencils and the green gel crayon.


The stencil I chose had (what I describe as) a basket weave style pattern, and I applied the colour of the gel crayon through it using a stencil brush. (You can see exactly how I do it in my process video below.) In addition to the stencilling, I also added some extra detail to my background using navy ink and some floral stamps from the Pink Paislee stamp set that is included in the main kit. 


For my paper layers, I used a mix of different paper from the Heidi Swapp Carefree collection from the main kit. I layered a few pieces that I had torn and distressed, along with a white paper doily that was also from the kit. On top of the paper layers I added some frayed gauze before sticking my photos on top.


For my page title, I used the raw chipboard Thickers from the kit, which I coloured using Chipped Sapphire Distress Oxide, then added some stamped detail using one of the leafy stamps from the Pink Paislee stamp set. I love the way this tied them into the background detail. 


For my embellishments, I kept things relatively simple due to the how busy the layout was already from the papers and background. To the left of my photos I placed a handmade heart embellishment from Charms Creations, which I topped with a Heidi Swapp sticker and a few staples. I also added a few more stickers and pieces from the coordinating ephemera pack, including a phrase along the bottom and a tab above the photos; a small rainbow and some chevrons. I used a label for my journalling, adding simple handwritten details with a felt pen. 


I really love how this layout turned out, and despite how detailed it may appear, it came together pretty easily. If you would like to see how I put it together, you can watch my process video here:


If you do pop over to watch my video, I would love it if you could give me thumbs up, leave me a comment or subscribe to my channel while you are there. Having people interact with my content helps me to build my channel profile and it's also great to know that you like what I do and want to see more.

Thanks for stopping by today, and for everyone who continues to support me. Until next time, happy scrapping! X
Wednesday, 27 November 2019

"Epic Adventure" Mini Album | Scrapping Clearly


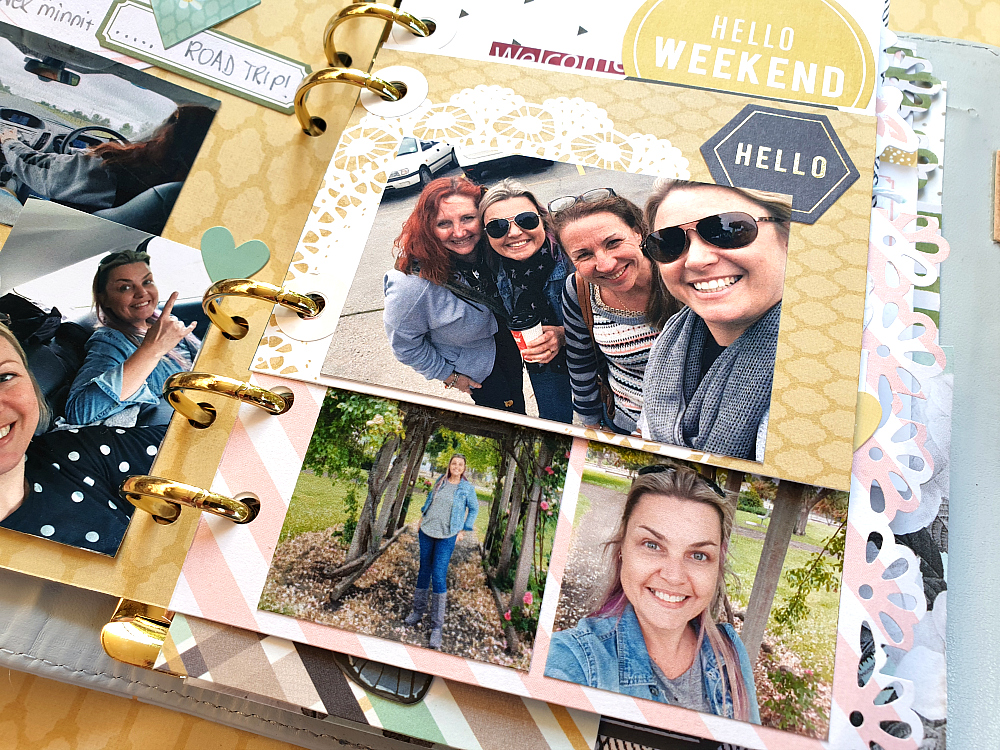
Hi everyone! Back again to share my final project that I created as a guest designer for Scrapping Clearly last month. Today I am sharing a special mini album I created to document an epic adventure I had with my sister - a surprise weekend away to celebrate her birthday that was organised by her partner (and a few sneaky scrappy gals!)


There is so much to love packed into this album - not just the memories, but some beautiful products too. I have found myself using a lot more patterned papers lately, and falling in love with paper all over again.

So, let's get started on this album. I began with a pile of photos and a small 6 ring binder-style planner I purchased at Kmart. I opened it up and removed everything from the inside, leaving me with the cover only. 


I started by making myself a "kit" of coordinating items to work from that included a variety of patterned papers; stickers; and die cut ephemera.


I chose a number of patterned papers from the Simple Stories 'Heart' and Heidi Swapp 'Emerson Lane' collections; with some odd sheets from Pink Paislee and Websters Pages added in. My main criteria when choosing the papers for my kit was colour choice - with both the A and B sides of each one needing to fit my chosen palette. 


I started by cutting the sheets of paper into smaller "pages" - trimming each one into a variety of different sizes and shapes. I then used a few different decorative border punches to punch along some of the edges. 


Now it was time to sort the pages into some sort of order. I shuffled and stacked them, making sure that the sizes were mixed up and that colours and patterns on facing pages were complimentary to one another. I then punched each page using an adjustable 6-hole punch; adding some hole reinforcer stickers as I placed them into the binder.


With all of my pages in place, it was time to start adding my photos. (I do admit that the order of the pages did get shuffled a little as I began to work my way through the book.)


I treated each page just like a tiny scrapbook layout - I had a background, photo/s and now they just needed embellishments. I didn't want to use anything bulky because I wanted to make sure the pages would lay flat, so I chose a mix of stickers and die cuts to use.


To coordinate with the papers I had chosen, I used the Simple Stories 'Heart' Cardstock Stickers; and the Heidi Swapp 'Emerson Lane' Stickers and matching Ephemera


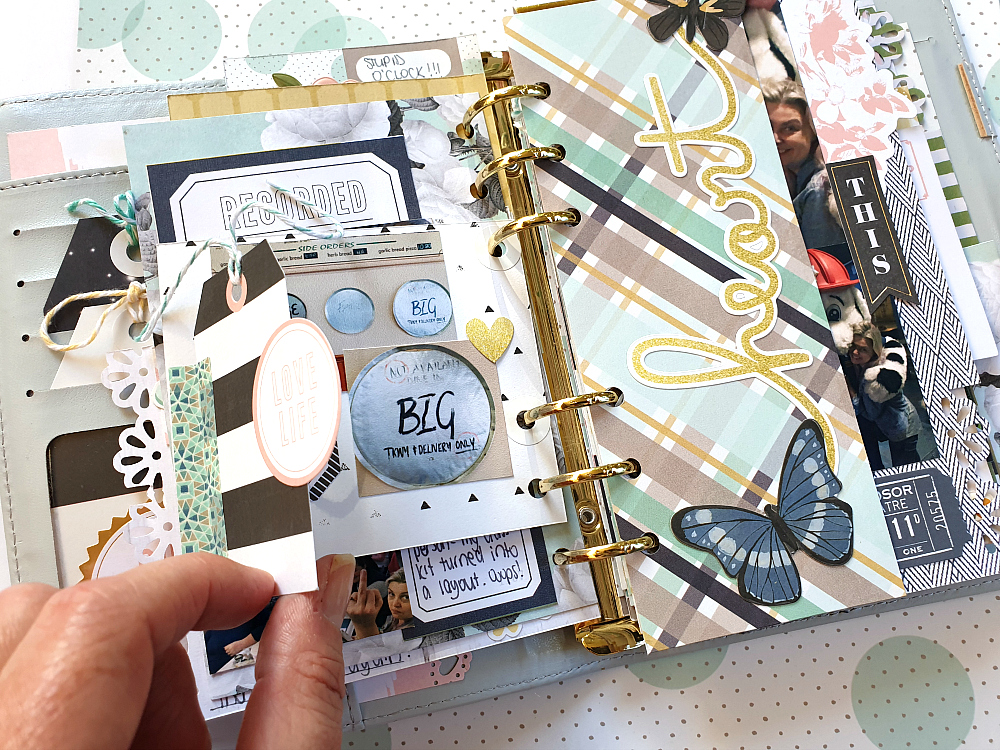
Throughout the album I added extra interest to some of the pages by adding "tip-ins" (extra interactive flaps) using tags / ephemera / pieces of paper, which I fastened with washi tape. (There is even a set of coordinating 'Emerson Lane' Washi Tapes!)


I left some of the pages in the album photo-free and kept them simply decorative. You can see how having a good variety of different page sizes, colours and patterns adds plenty of visual interest.


I did choose a couple of embellishments that were slightly dimensional to use in my album - the super cute Pebbles 'Spring Fling' Puffy Stickers - Flowers; and the 1 Canoe 2 'Globe Gallery' 3D Butterflies.


I made an effort to include handwritten journalling on as many of the pages as I could - using a variety of labels, journal tags and even paper offcuts to write on.


Another way to switch things up in the album is to add the photos sidewards - just as I did with the landscape shot, which allowed it to be printed larger.


Never be afraid to punch directly through a photo to turn it into a page itself; and when dealing with small pages, sometimes it is better to embellish over part of the photo.


When working on a small scale like this, especially with papers featuring bold patterns, it is better to keep to the "less is more" rule with embellishments.


Look at the papers you have and see what can be fussy cut from them to use as embellishments, such as flowers, labels, shapes and quotes.


Design tip: to help your embellishments stretch further, cut things such as label stickers in half. The irregular shape also makes it more interesting to look at.


Another way to add extra interactive elements to your album is to include small envelopes, which can be used to hold memorabilia, journalling or even extra photos (just like I did in my special "sealed section").


This is by no means all the pages from my album - there are just too many pages to share here (and some still to be completed). Once I have them all finished I will try and film an album flip through to share with you on my YouTube channel and in the Scrapping Clearly Facebook group

A big thanks to the gorgeous Kylie and the team for having me as a guest - I so enjoyed creating and  sharing my projects with you.
If you would like to shop up a storm in Kylie's store, you can find it HERE
Until next time, happy scrapping! X

Sunday, 16 June 2019

Good Times | Scrap the Girls June Challenge


Hi everyone! 
Today I am sharing my take on this month's challenge at Scrap the Girls, which has affectionately been named the "Nanas" challenge. It is all about mismatched patterns and colours that somehow create their own style.
Here is the inspiration picture...


I stared long and hard at this picture before deciding what I was going to chose as my inspiration starting point. Eventually, I decided to begin with a strong geometric print, which I found in the Paige Taylor Evans 'Whimsical' collection.

I also started with a white cardstock base and a photo of my daughter and her friends ready to head off to school camp (which I had printed in black and white so that I wasn't restricted by colour).


Because this challenge was all about mismatched patterns, I decided to use a strong vertical design to clash with the horizontal nature of the photo and subjects. I used strips of the geometric print paper which I contrasted using the small cross print and the solid yellow. (The yellow was a special nod to the clogs in the inspiration picture.)


I chose another pattern (a small star print) to mat my photo with; and I also added a small strip of the same paper that I punched with a heart edge punch along the left side of my design. To give my photo some separation from the busy background I popped some scrap cardboard underneath before sticking it down.


At this point I turned back to the inspiration picture and decided that the additional of some flowers would help break up the solid, graphic nature of my design. I chose a large floral design paper (again, from the Paige Evans 'Whimsical' collection) and fussy cut some of the flowers. I tucked them under the diagonally opposed corners of my photo to give the page some flow and draw the viewers eye through it.


To add a little text to my page, I added a few phrase stickers from the coordinating 'Whimsical' sticker sheet and a sweet little butterfly from the ephemera pack for some dimension.

At this point my layout looked a little too clean for my liking, so I pulled out my Faber-Castell watercolor pencils to add some extra detail. I used the pencils to add some scribbled colour around and under the edges of the fussy cut flowers along the right side of the page, then used a water brush to blend the colour out a little.


I finished off my layout with a few tiny ink splatters.

Thanks so much for stopping by today so I could share this with you. I hope you can play along with our challenge at Scrap the Girls this month. We have D-lish Scraps sponsoring for our Aussie winner, and as always Scrap Accent for our international entries. For all the challenge details, or to see what else the design team created for this one, head to the Scrap the Girls blog HERE
Until next time - happy scrapping! X