

Hi everyone! Back again to share my final project that I created as a guest designer for Scrapping Clearly last month. Today I am sharing a special mini album I created to document an epic adventure I had with my sister - a surprise weekend away to celebrate her birthday that was organised by her partner (and a few sneaky scrappy gals!)

There is so much to love packed into this album - not just the memories, but some beautiful products too. I have found myself using a lot more patterned papers lately, and falling in love with paper all over again.
So, let's get started on this album. I began with a pile of photos and a small 6 ring binder-style planner I purchased at Kmart. I opened it up and removed everything from the inside, leaving me with the cover only.

I started by making myself a "kit" of coordinating items to work from that included a variety of patterned papers; stickers; and die cut ephemera.

I chose a number of patterned papers from the Simple Stories 'Heart' and Heidi Swapp 'Emerson Lane' collections; with some odd sheets from Pink Paislee and Websters Pages added in. My main criteria when choosing the papers for my kit was colour choice - with both the A and B sides of each one needing to fit my chosen palette.

I started by cutting the sheets of paper into smaller "pages" - trimming each one into a variety of different sizes and shapes. I then used a few different decorative border punches to punch along some of the edges.
Now it was time to sort the pages into some sort of order. I shuffled and stacked them, making sure that the sizes were mixed up and that colours and patterns on facing pages were complimentary to one another. I then punched each page using an adjustable 6-hole punch; adding some hole reinforcer stickers as I placed them into the binder.

With all of my pages in place, it was time to start adding my photos. (I do admit that the order of the pages did get shuffled a little as I began to work my way through the book.)

I treated each page just like a tiny scrapbook layout - I had a background, photo/s and now they just needed embellishments. I didn't want to use anything bulky because I wanted to make sure the pages would lay flat, so I chose a mix of stickers and die cuts to use.

To coordinate with the papers I had chosen, I used the Simple Stories 'Heart' Cardstock Stickers; and the Heidi Swapp 'Emerson Lane' Stickers and matching Ephemera.
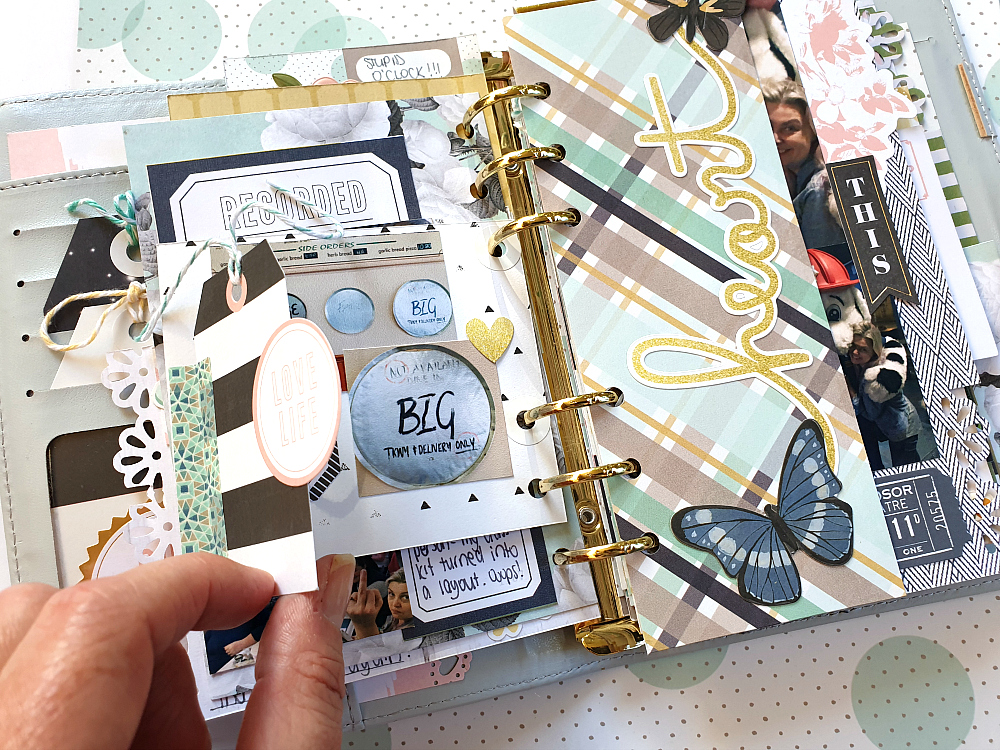
Throughout the album I added extra interest to some of the pages by adding "tip-ins" (extra interactive flaps) using tags / ephemera / pieces of paper, which I fastened with washi tape. (There is even a set of coordinating 'Emerson Lane' Washi Tapes!)

I left some of the pages in the album photo-free and kept them simply decorative. You can see how having a good variety of different page sizes, colours and patterns adds plenty of visual interest.

I did choose a couple of embellishments that were slightly dimensional to use in my album - the super cute Pebbles 'Spring Fling' Puffy Stickers - Flowers; and the 1 Canoe 2 'Globe Gallery' 3D Butterflies.

I made an effort to include handwritten journalling on as many of the pages as I could - using a variety of labels, journal tags and even paper offcuts to write on.

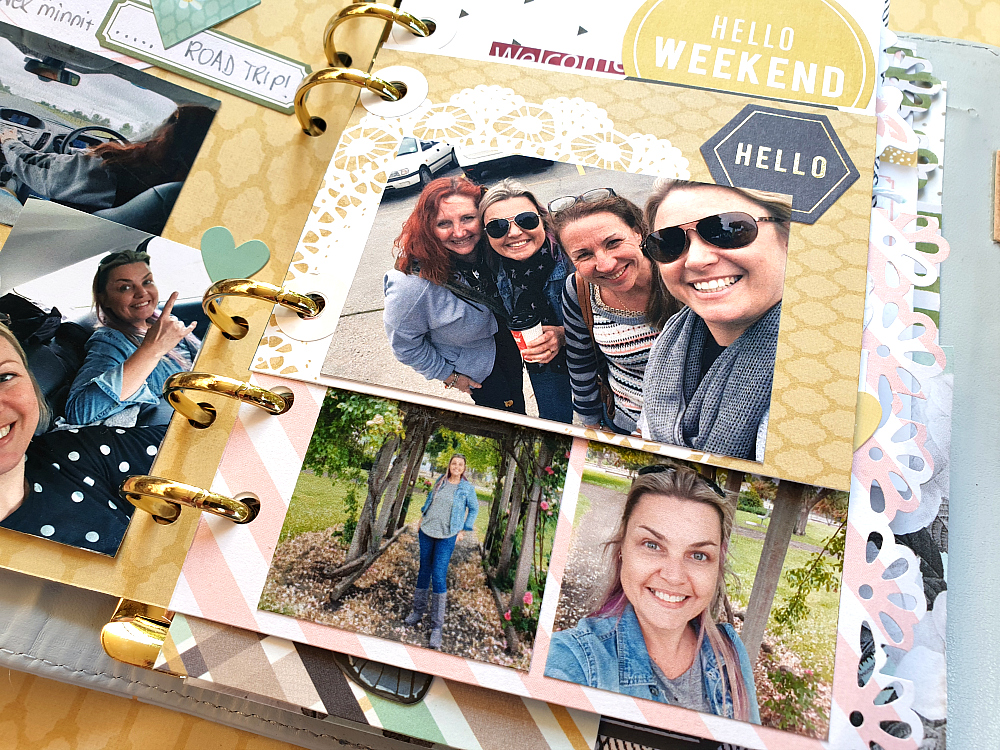
Another way to switch things up in the album is to add the photos sidewards - just as I did with the landscape shot, which allowed it to be printed larger.

Never be afraid to punch directly through a photo to turn it into a page itself; and when dealing with small pages, sometimes it is better to embellish over part of the photo.

When working on a small scale like this, especially with papers featuring bold patterns, it is better to keep to the "less is more" rule with embellishments.

Look at the papers you have and see what can be fussy cut from them to use as embellishments, such as flowers, labels, shapes and quotes.

Design tip: to help your embellishments stretch further, cut things such as label stickers in half. The irregular shape also makes it more interesting to look at.

Another way to add extra interactive elements to your album is to include small envelopes, which can be used to hold memorabilia, journalling or even extra photos (just like I did in my special "sealed section").

This is by no means all the pages from my album - there are just too many pages to share here (and some still to be completed). Once I have them all finished I will try and film an album flip through to share with you on my YouTube channel and in the Scrapping Clearly Facebook group.
A big thanks to the gorgeous Kylie and the team for having me as a guest - I so enjoyed creating and sharing my projects with you.
If you would like to shop up a storm in Kylie's store, you can find it HERE
Until next time, happy scrapping! X
If you would like to shop up a storm in Kylie's store, you can find it HERE
Until next time, happy scrapping! X


