Showing posts with label black heavy gesso. Show all posts

Tuesday, 2 October 2018

Live Your Art | Viva Las VegaStamps


Hi everyone!
Popping in today to share my latest Viva Las VegaStamps design team project with you. This mixed media scrapbook page was created using some awesome Banksy stamps and a couple of photos of my son indulging in some spray paint art action.


This page was alllll about the background! I drew my inspiration from the colours and shapes in the photos to guide me as I constructed my layers. I began by adding some teal Kaisercraft acrylic paint in the centre of my page using a brayer. I then used a wide brush to apply some Colour Blast black heavy gesso in a few spots over the top of the teal paint.


Next, I took a yellow Faber-Castell gelato and added a few little scribbles here and there before using a baby wipe to blend them out into the background. I then went back with my brayer and some white acrylic paint and stripped back the colour a little in a few places. I used the Donna Downey "Live Your Art" stencil and sponged the title in using Staz On ink, then used a Posca paint pen to add a few highlights.


Now it was time for some stamping! I used the Banksy Salvador Dali Street Artist stamp and placed him at the beginning of my title. I also used the Banksy Who's Bad stamp to add the words above him. In the bottom corner of my page I used the Banksy Ladder Painter just underneath my title.


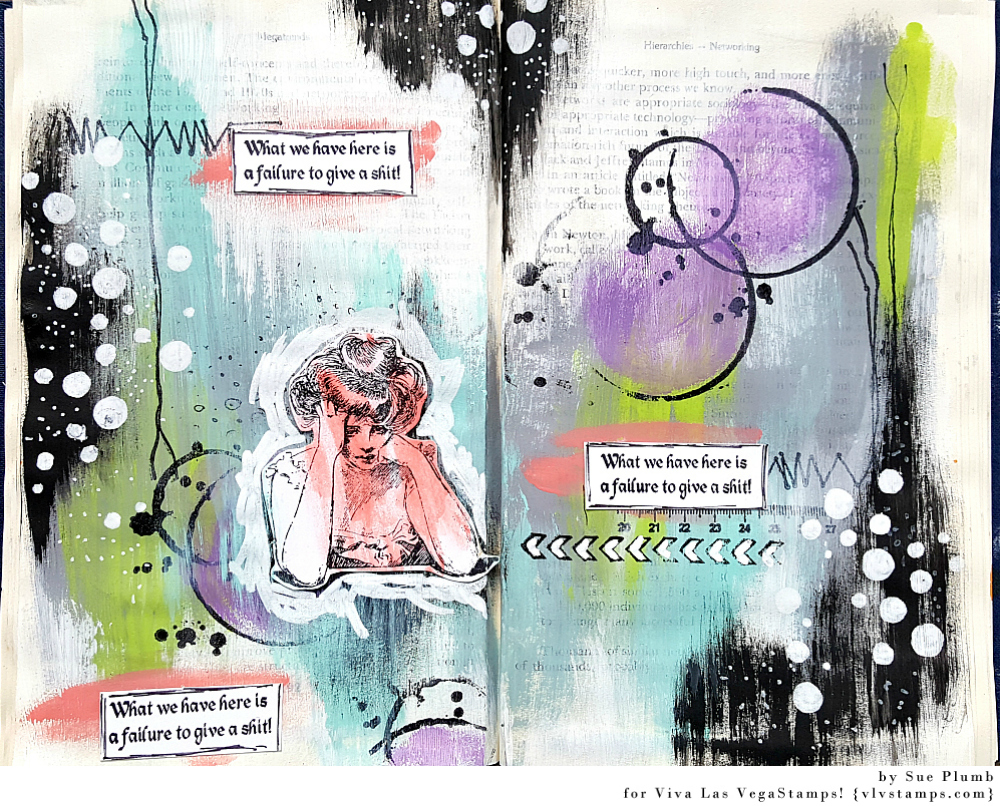
I wanted to add a bit of extra interest and help draw the viewer's eye through my title, so I used the Row Of Chevrons stamp and stamped it several times at the beginning of the title words. I then took a pink gelato and added some random scribbles to the page to mimic the pink on the art in the photos. I also splattered some Colour Blast 'Rainforest' Colour Spray. 


Next, it was time to add some textured layers for my photos to sit on. I used a paper doily, some punchinella and some frayed gauze. I then added some cardboard to the back of my photos to pop them up before adhering them on top.


After the photos were in place, I was able to add the Look mum I am a street artist quote using the Banksy Look Mum stamp. (Could there have been a more perfect quote for this page?!)
To finish off, I added some twisted pieces of coloured wire which I secured in place with staples; and then a few dots and spots using my favourite Doodle Dots stamp.

Thanks for stopping by so I could share this with you. I hope I have inspired you to get inky too! X 

VLVS stamps used:

Saturday, 29 September 2018

"Beautiful Disaster" Canvas Class - Scrap & Chat Retreat


Hi everyone!
Just popping in with a project share and a quick wrap up of the class I taught last month at the annual Scrap & Chat retreat in the Dandenong Ranges near Melbourne. (If you have never been on a retreat, let me tell you that there is nothing that compares to being around 60 like-minded people for a weekend full of creating. So good for the soul!)

I had so much fun teaching my class to all these gorgeous ladies...


The piece I taught was a mixed media canvas panel, entitled "Beautiful Disaster" and it was a great opportunity to fly the flag for a number of my favourite brands including Colour Blast, Cocoa Vanilla Studio, Flutterby Designs and StencilGirl.


The canvas was was coloured with my favourite Colour Blast product - Colour Artist Inks, and we used the warm tones of Slipper, Cranberry, Cider and Citrus for the background; then the cool blue colour of Oasis for adding some contrasting highlights. 


Besides the Colour Artist Inks, we also used one of my other favourite Colour Blast products - Colour Paste. We used Deep Water for contrast and texture, applied through a Flutterby Designs stencil (although there were a couple of ladies who used Lovely Lilac from my stash because we thought it would work better with the pieces they had created). 


We also used Colour Blast black and white heavy gessos on the canvases - using the white to strip back colour and offer the eye a place to rest; and black to add contrast and tie in with the StencilGirl 'Talaya: Goddess of Rain' stencilled image and the Flutterby Designs quote. This was probably the messiest part of the class as I encouraged everyone to test my motto that "fingers make the best brushes" - so fun! 


We finished off the canvases with some 'Bohemian Dream' vellum accent embellishments from Cocoa Vanilla Studio. The gorgeous colours of the printed vellum die cuts worked beautifully with the tones of the inks and paste. 


I so enjoyed the opportunity to fly the flag for some of my favourite products and to share my love of mixed media with such a lovely group of ladies. Thanks to everyone who attended!

If you would like me to come and teach at your local scrapbook store or event, I am happy to discuss your requirements and see if we can make it work. You can email me via the contact tab at the top of the page.
Until next time, happy scrapping! X

Saturday, 22 September 2018

Galaxy Painting | Colour Blast


Hi everyone!
Sue Plumb here to share my latest Colour Blast design team project with you. Today I am sharing a galaxy themed painting I created using Colour Shimmer Dusts and black and white heavy gesso. I cannot claim that this piece was my own idea, as I was inspired by several videos I saw on YouTube (search galaxy painting tutorials if you want to see some yourself). 


To prepare for this project, begin with a sheet of watercolour paper. It is important to use watercolour paper, as you need a surface that will allow the paint to move and blend freely. To keep the paper flat, I used washi tape to secure it to my craft mat. I then mixed up the Colour Shimmer Dusts I was going to use with a little water in my paint palette, and set them aside.
(Also ensure you have on hand - a cup with clean water and paper towel.)


To begin, I brushed the surface of the paper all over with water (not too much), as this piece uses the "wet on wet" watercolour technique.
I started by applying the lightest blue colour I had chosen, which was Duke, using a wavy motion with my brush. You will see the colour start to wick out onto the wet paper. The colour will pool more heavily in some areas than others - this is completely fine. (There are lots more layers to go yet!) Be sure to leave a little spot or two of white space in the centre area of the page.


Once the first colour is in place, you can repeat the process with the next colour (working from lightest to darkest). I actually opted to leave out the 'Cobalt' Colour Shimmer Dust at this point and moved straight to 'Navy' instead.


I followed some of the natural lines already formed by the previous colour and used more of a dabbing motion to apply the colour this time. 
Here's a quick look at what I mean...


As you work, if you find an area is getting too wet or the colour runs where you don't want it, simply blot away with paper towel. Remember that you want the piece to be darker the closer you get to the edges. 


Once you are happy with the 'Navy', repeat the process with the 'Midnight' Colour Shimmer Dust, keeping this darkest tone more concentrated to the edges of the piece
Once you have all these colours in place, allow the piece to dry a bit so you can assess it (you can use a heat gun to speed it up a bit if you wish). If you find some areas are a little dark, go back in with a brush loaded with clean water and reactivate the paint where you want to strip the colour away and simply blot some off with paper towel.


You can then go ahead and add some purple into your piece in these using either 'Passion' or 'Velvet' Colour Shimmer Dust. (Just remember not too much, and keep to the lighter areas in the centre of the page intact.) You can go back as many times as you want to with any of the colours until you get the desired effect. Once you are happy, allow it to dry completely until moving onto the next step. 


Using the White Heavy Gesso and a wooden skewer (you could also use the flat end of a small paintbrush or pencil), add some dots to represent stars around the page. Then, using the pointed end, drag the tip outwards from the centre of a couple of them to imitate the light shining from them.


For the remaining stars in the galaxy, mix a small amount of gesso and a few drops of water to make a thinner consistency. Take a small, stiff brush and use a tapping motion to add small splatters randomly all over the page and allow to dry.


To finish off, take some black heavy gesso and paint some tree silhouettes along the bottom edge of the page. (Don't try to be precise with these, you are not looking for perfection!)


And there you have it - painting complete! Here's a little video of the finished project close up so you can check out the details and shimmer...


Thanks for stopping by so I could share this with you. I hope I have inspired you to try one of these yourself. If you do, please share it in the Colour Blast Creative Corner so I can see it!
Until next time, happy creating! X

Monday, 28 May 2018

Space Girl Mail Art | Viva Las VegaStamps


Hi everyone!
Popping in today to share my latest design team project for Viva Las VegaStamps, and this time it's a mail art piece I have to share. I recently had a giveaway over on my Sue Plumb Designs Facebook page to celebrate {inter}National Scrapbook Day and needed to post the prize out to my lucky winner, so I figured why not kill two birds with one stone and use the box as an opportunity for some fun mail art.


I recycled a pizza box I had previously received scrapbooking supplies in, so I had some details on the front I had to cover up first, which I did quickly by roughly applying some Colour Blast black heavy gesso with a wide brush. I then cut an 8x8" piece of cardstock to use for my address label and stamped out my design.


I was dying to use one of the Space Girl stamps designed by Katy Paltridge (daughter of Fiona) from the new release plate #1501, and I chose some complimentary stamps to use along with it. I used the word Starbound and also the Grungey Strip of Stars which were both from the astrologically themed new release plate #1500. The final stamp I chose was the Sky of Stars Background, which has been one of my recent favourites. 


I then used a selection of Faber-Castell watercolour pencils and a water brush to add some colour to my images. (Using watercolour pencils is one of my favourite colouring methods for stamps - quick, easy, accurate, and I love the look of them.)


Once I had added all the colour, I adhered my label to the box using Miracle Tape and then used a white Sharpie pen to add some "star" detail and give it a "galaxy" appearance.


Then it was simply a matter of adding the recipient details to my label and then sealing over it with clear packaging tape to protect it.


Here's a list of the VLVS stamps I used:
- "Aquarium Space Girl" from plate #1501
- "Starbound" from plate #1500
- "Grungey Strip of Stars" from plate #1500
Sky of Stars Background

Thanks for stopping by so I could share this - I hope I have inspired you to get inky too! I will be back soon with another project to share. Until then, happy scrapping! X

Tuesday, 8 May 2018

Stay Classy | Scrap the Girls May Challenge


Hi everyone! Have you checked out this month's challenge at Scrap the Girls yet? It's a fabulous themed mood board called "Birthday Girl" and it looks like this...


I took the opportunity to be inspired to scrap a photo of one of my friends and I enjoying some drunken party shenanigans. The photo was taken at my besties' "Pimps & Hoes" dress up 40th birthday party last year and it was so much fun! I was also inspired by the pink in the board.


I decided to use the Flutterby Designs 'We Run the World' collection for my layout as the colours and theme worked well with my photo. I used a sheet of very pale pink Cocoa Vanilla Studio patterned paper for my background to start with, then laid the extra piece of the Flutterby floral print 'Frida' paper over the top.


Along the edges of the 'Frida' paper I added some stamping using my Viva Las VegaStamps staple stamps (Staple X; Three Staples; and Six Staples.) To define my focal area, I painted some Colour Blast black heavy gesso across my page using a wide brush. 


I then created a layered photo mat using some of the 'We Run the World' Everyday Etc filler cards and a D-lish Scraps paper doily. The black gesso helped to separate my layers from the background and provide more depth. I also some pieces of torn washi tape.


Alongside my photo I added my title card, which was fussy cut from one of the 'We Run the World' Everyday Etc cards. I popped it up on a bit of foam tape to give it some dimension and also added some more torn washi and a die cut heart from the 'We Run the World' Die Cut Bits & Bobs pack.


To the left of my photo I added a hot pink Charms Creations heart, which I topped with some messy cotton thread and a Flutterby Designs flair button


Below my photo I added the die cut awesome word (also from the Bits & Bobs pack); and a couple of Tiny Sticky Quotes. I also added my handwritten journalling and stamped the date.
I then added a few neon enamel dots around my page and a little bit of stamping using my Viva Las VegaStamps 'Doodle Dots' stamp.

I hope you get the chance to play along with us this month. Up for grabs is a store voucher to the Cocoa Vanilla Studio store (perfect with the new 'Boys Rule' collection being released in a few weeks!) Get your entries linked up before the end of the month - check this post HERE for all the details and to see what the rest of the DT created.
Until next time, happy scrapping! X

Friday, 13 April 2018

Failure to Give a Shit | Viva Las VegaStamps


Hi everyone!
Happy Friday! Popping in today to share an art journal spread I created in my altered book journal recently for Viva Las VegaStamps. I use this journal not only as a creative outlet, but also as a way of expressing my thoughts and feelings. This spread was created on one of "those days" - you know, the ones when you are just over thinking about all the insignificant things in life? 


I felt like working with acrylic paints for this project, so I pulled out my Flutterby Designs Flutter Colour paints. I used a medium sized brush and randomly spread some paint across the pages.


Once I had the colour down and dry; I decided to tone down the remaining print a bit, so I used some Colour Blast white heavy gesso over the text, which I applied simply with a brush.


After I was happy with the colour, it was time to add some depth and structure to my background with stamps. 
I used Staz On ink and the following stamps:


I then used some purple acrylic paint (applied with my finger) to add some colour to the centre of my coffee ring stains.


For my focal image I used the Fed Up Vintage Lady stamp. I smeared some ink acrylic pant onto some cardstock and then stamped the image over the top before cutting it out. (Confession time: after stamping and cutting the image I decided I wanted less colour, so I re-did it.)
I also stamped out a few copies of the quote I was using with the What We Have Here stamp; which I cut into small strips.


I decided my page need some more contrast, so I added a few areas of contrast using Colour Blast black heavy gesso; and a few smears of the pink paint where my quotes were going to be placed. I also added a little bit of light stamping with my favourite Doodle Dots stamp. 
I then stuck down my quotes and feature image.


To finish my spread, I added a few highlights using a Flutterby Designs 'Bubble O'Fun' stencil; white paint pens (Posca and Sharpie); and also a black Sharpie.


Here's a closer look at the finished details...


Thanks for stopping by so I could share this with you. I hope I have inspired you to get inky too!
Until next time, happy scrapping! X