

Hi everyone!
Popping in today to share a layout I created recently featuring the gorgeous 'Unforgettable' collection from Cocoa Vanilla Studio. For this page I wanted to document some sweet photos of my hubby and our cat that were taken when he was just a kitten. And with two males in the photos, I needed to put a masculine spin on it. (And yes, I think a pop of purple is perfectly acceptable for a masculine page!)

Starting with a white cardstock background, the first paper I was drawn to was the gorgeous wood grain print of the Natural Beauty paper. I am a huge fan of wood grain papers, and I have to say, I think this one is my favourite so far! The tones, the pattern of the grain - it's just perfect. I cut a large piece and placed it vertically on the left side of my page.

I overlaid the wood grain print with a piece of the minty green watercolour print paper from the 6x8" Paper Stack (in the 12x12" papers this is the reverse print of the Garland paper). I used a notebook style paper punch to punch the edge of it for extra interest.
Then it was time to add some horizontal structure to my page. I used an extra piece of the same mint paper again; along with a piece of the black and white leafy print from the reverse side of the Natural Beauty paper; the grey stripe from the reverse of the Glorious paper; and the mint diagonal stripe from the Sprightly paper.
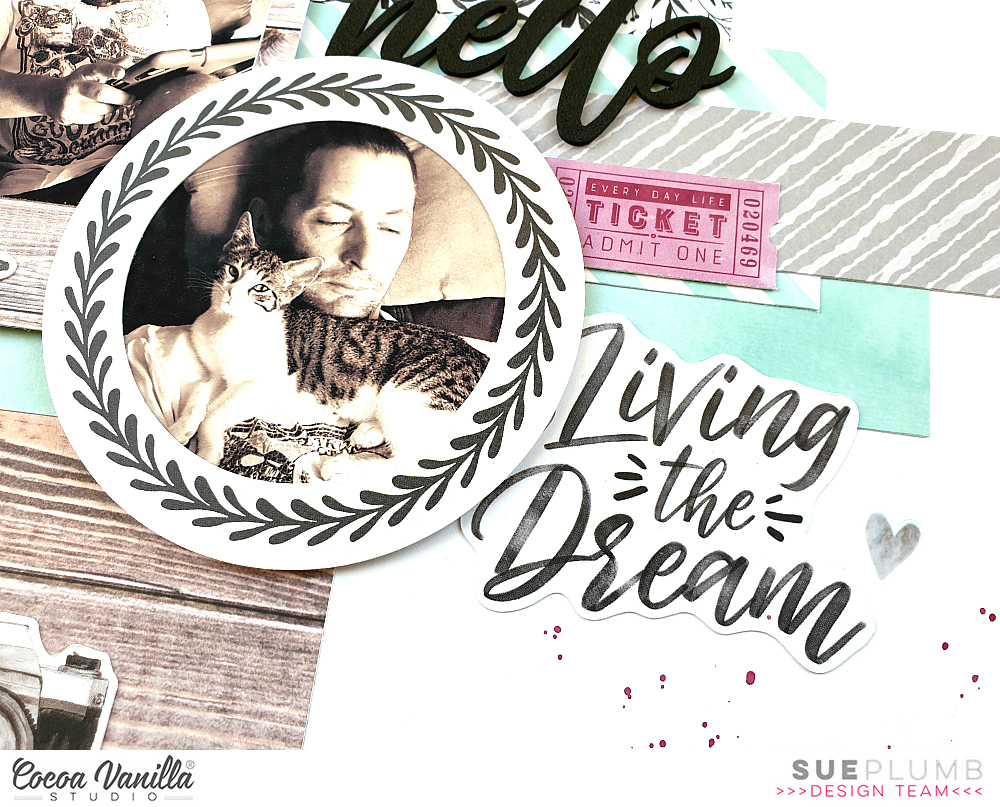
I decided to frame each of my photos using frames from the Die Cut Ephemera pack - one a gorgeous polaroid style wood grain and the other a black and white wreath. I positioned each of them over the patterned papers layers, using some cardboard behind them to pop them up from the page.

Now it was time to add some fun embellishments to bring all the elements of my page together.
I started with the Foam Title Stickers, choosing the word hello and adding it alongside my top photo. I then reached for the Die Cut Ephemera pack again - choosing the Living the Dream phrase piece to go alongside the lower photo. Between the two, I added the purple ticket from the ephemera pack.
I then took another frame from the ephemera pack, this time a sweet circular frame with a doodled heart border. I cut it into two pieces, tucking the larger piece around the corner of my top photo, and the second smaller piece in behind the hello sticker. I also added a label for my journalling that was fussy cut from the Story Teller paper.

After writing my journalling on the label, I added the super cute retro style camera and a small heart (both from the ephemera pack) to create a small cluster. Then, to balance it out, I added a small strip of the reverse side of the Natural Beauty paper at the top of my page, and the true story sticker from the Accessory Sticker sheet over the top.

Almost done - time for a few finishing touches! I added two small hearts from the Clear Sticker sheet; the purple butterfly from the Die Cut Ephemera pack; and the Life is Good sticker from the Accessory Sticker sheet.
I then stamped the oh happy life phrase using a stamp from my stash and added a few tiny splatters of berry ink.
That's all from me today, thanks for stopping by so I could share this with you.
Until next time, happy scrapping! X
No comments:
Post a Comment